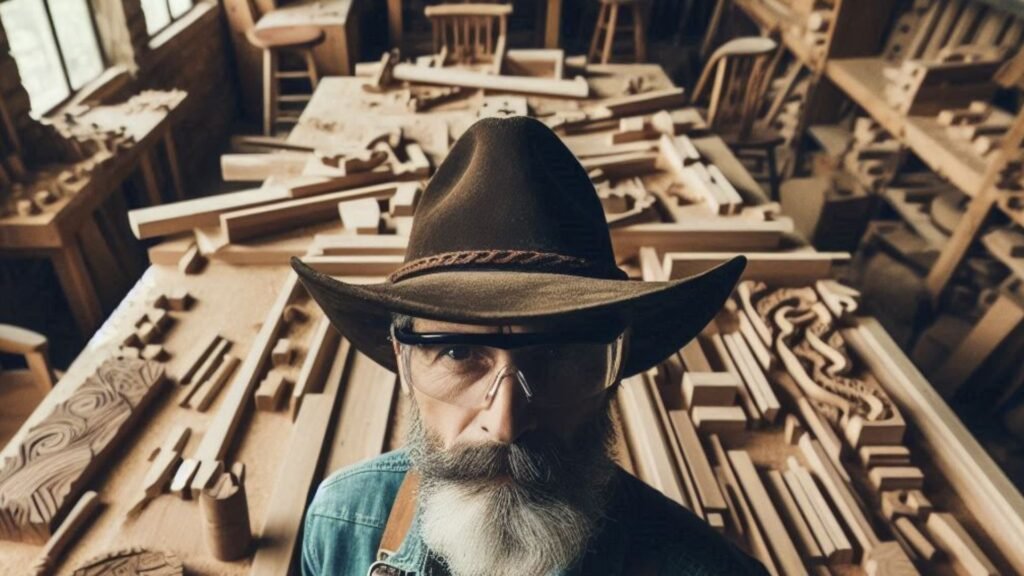
Learn The Basics Of Each Type Of Woodwork.
Historically, woodworking has played a significant role in human development. Early humans utilized wood to create essential tools and structures, which evolved into more sophisticated forms of craftsmanship over centuries.
The Middle Ages saw the flourishing of woodworking as a skilled trade, with guilds and apprenticeships ensuring the preservation and transmission of intricate techniques.
Today, woodworking remains a respected and cherished craft, blending traditional methods with modern innovations.
The journey to mastering woodworking is not a swift one. It demands a commitment to learning and perfecting techniques through repeated practice. Patience is crucial, as the process often involves meticulous attention to detail and a willingness to learn from mistakes.
Dedication is equally important; dedicating time to the craft allows for the gradual honing of skills and the development of a personal style.
Woodworking is more than just a craft; it is a creative artform that encourages continuous learning and growth.
Whether one is crafting a simple piece of furniture or an elaborate sculpture, the process of transforming raw wood into a finished product is immensely rewarding.
As you embark on this journey, you will find that the time, patience, and dedication invested in woodworking are invaluable, leading to both personal fulfillment and artistic achievement.
What is Wood Carving?

Woodcarving is an artistic pursuit that allows woodworkers to unleash their inner sculptor, transforming raw timber into detailed and expressive pieces.
In a nutshell, it is generally the process of shaping something from a block of wood by scraping away portions of the base material with a sharp handheld implement until all that is left is the desired creation.
Wood carving encompasses any type of sculpture made of wood. Woods used for carving vary greatly in hardness and texture.
Hardwoods are more difficult to shape but have a higher lustre and endurance, whereas softwoods are easier to shape but less durable.
Whether utilizing traditional hand tools, modern power tools, or even chainsaws for grander projects, the scope of woodcarving is vast and varied.
Each tool offers its unique advantages, demanding a different set of skills and techniques from the craftsman.
Hand tools such as chisels, gouges, and mallets are the cornerstone of traditional woodcarving. These tools allow for precise control, enabling the carver to create intricate patterns and detailed textures.
Mastering hand tools requires patience and practice, as each stroke must be deliberate and controlled.
Relief carving, a technique where the sculpted elements remain attached to a solid background, is a common practice that showcases the impressive detail achievable with hand tools.
For those seeking efficiency and speed, power tools offer a modern alternative. Electric carving tools, such as rotary tools and reciprocating carvers, can significantly reduce the time required to shape wood.
These tools are particularly useful in intermediate to advanced projects, where large amounts of material need to be removed quickly.
Power tools also open the door to more complex designs and allow for the exploration of different textures and finishes.
Chainsaw carving represents the pinnacle of large-scale woodcarving and various sizes of chainsaws are used in this popular type of wood carving.
Chainsaw carving dates back to the 1950s, and it is highly competitive, with regular competitions held where artists put pit their skills against one another.
This technique, often seen in the creation of monumental sculptures and outdoor installations, requires a high degree of skill and confidence.
Chainsaws allow for the rapid removal of large sections of wood, enabling the carver to rough out a basic shape before refining the details with smaller tools. This method is not for the faint-hearted, but for those with the dedication and courage to master it, the results can be awe-inspiring.
Whether through the meticulous use of hand tools, the efficiency of power tools, or the bold strokes of a chainsaw, woodcarving offers a profound connection between the artist and their medium.
The journey from a simple block of wood to a finished piece is a testament to the carver’s skill, patience, and dedication, truly bringing the wood to life.
The Art of Whittling Is Crafting with a Knife.

Whittling, also known as knife carving, is the craft of carving wood with straight or hook knives.
Whittling is the oldest type of wood carving and is typically done with softwoods because hardwoods are difficult to cut and add tiny features to.
By cutting wood with a knife, you can give it a large variety of different shapes and designs.
In the majority of whittling projects, the knife lines are not sanded to hide them; they are a feature, not a flaw, and whittled projects look much better with the lines exposed.
Whittling does not require the use of large, expensive tools and the majority of carvings require only a pocket knife and a piece of softwood and it’s advised that you wear cut resistant gloves.
At the heart of whittling lies the knife, an extension of the craftsman’s hand. Selecting the right knife is crucial; beginners often start with a basic pocket knife or a whittling knife designed specifically for precision and control.
Safety is paramount; proper technique involves steady, controlled cuts away from the body, minimizing the risk of injury. It is advisable to practice on softer woods such as basswood or pine, which are easier to carve and less taxing on the blade.
Small whittling projects offer a manageable entry point into this craft. Common beginner projects include simple shapes like spoons, forks, and small animals.
As skill and confidence grow, more intricate designs can be attempted, such as detailed figurines and ornate patterns.
Once you have got some experience with whittling you can make attractive items such as a rabbit, wooden flowers, and many other miniature figurines with a lot of patience and small pieces of softwood.
Each project, regardless of its complexity, provides an opportunity to refine technique and develop a deeper understanding of the material.
The creation of intricate figurines represents a significant milestone in the journey of a whittler. These projects demand a higher level of precision and an eye for detail.
Starting with a rough outline, the craftsman gradually carves away excess wood, revealing the final form hidden within the block.
Patience and a steady hand are essential, as even minor errors can alter the intended outcome. The satisfaction derived from completing a figurine is immense, serving as both a testament to skill and a tangible representation of artistic vision.
Whittling is a very rewarding and enriching aspect of woodworking. It offers a unique blend of challenge and accessibility, making it an excellent pursuit for those looking to enhance their craft.
With practice and dedication, your knife can transform a piece of wood into a work of art, celebrating the enduring beauty of handcrafted creations.
What is Pyrography or Wood Burning?

Pyrography has been practiced for hundreds of years and involves burning wood and other materials with a heated metal pen, leaving behind a decorative pattern.
Pyrography, also known as wood burning and is a free-hand art technique used by skilled sketchers to decorate wood or other materials with burn marks created by the application of a heated object.
At its core, pyrography involves using a specialized tool, commonly known as a pyrography pen, which heats up to a high temperature.
This pen is used to burn designs onto wood, creating varying shades and depths based on the pressure and duration of the burn.
The process begins with selecting the appropriate wood, as softer woods such as basswood or pine are frequently preferred due to their smooth grain and ease of burning. Maple and poplar are the two most popular woods used.
One of the first steps in pyrography is pattern design. Beginners may start with simple patterns or trace pre-existing designs onto the wood surface.
As one gains confidence, freehand drawing becomes a viable option, allowing for more intricate and personalized artwork.
The precision required in pattern design demands a steady hand and a keen eye for detail, making practice essential for mastering this aspect of pyrography.
Texturing techniques are what truly bring pyrography art to life.
By varying the temperature of the pyrography pen and adjusting the pressure applied, artists can create a range of textures from fine lines to deep grooves.
Shading is another crucial technique, achieved by controlling the speed of the burning pen over the wood.
Lighter shades are created with quick, light strokes, whereas darker areas result from slower, more deliberate movements.
While pyrography may seem daunting at first, the artistic possibilities are boundless. From creating decorative plaques and personalized gifts to intricate portraits and landscapes, the only limit is one’s imagination.
As with any craft, dedication and patience are key components to success. With consistent practice, artists can develop their unique style and achieve remarkable precision in their work.
Pyrography is not just about burning wood; it’s about creating art with heat, transforming a simple piece of wood into a detailed and textured masterpiece.
Whether you’re a beginner looking to explore a new hobby or an intermediate artist aiming to refine your skills, the journey of mastering pyrography offers both challenges and immense rewards.
The Foundation of Woodworking That Is Carpentry.

Carpentry stands as the bedrock of woodworking, laying the critical groundwork for anyone aspiring to master this craft.
At its core, carpentry encompasses a broad array of skills and techniques essential for constructing and shaping wood-based structures.
From the initial stages of framing to the intricate details of finish work, a carpenter must understand and adeptly apply these foundational principles.
Framing serves as the skeleton of any woodworking project, providing the structural integrity necessary for both small and large-scale constructions.
This initial step involves creating the basic framework using various types of lumber and fasteners. Understanding the fundamentals of measurement, cutting, and assembly is crucial at this stage.
Precision in framing not only ensures the stability of the structure but also sets the stage for subsequent phases of the project.
Construction in carpentry involves more detailed work, transitioning from the rough structural elements to more refined and visible aspects.
This includes tasks such as installing doors, windows, and molding, which require a higher degree of accuracy and craftsmanship.
Distinguishing between rough and finish carpentry is essential here. Rough carpentry focuses on the basic structural framework, while finish carpentry deals with the fine details that contribute to the aesthetic appeal and functionality of the project.
The range of difficulty in carpentry spans from basic tasks suitable for beginners to complex projects that challenge even seasoned professionals.
Beginners might start with simple projects like building a basic frame or assembling a wooden shelf, gradually progressing to more advanced work as their skills improve.
Advanced carpenters often engage in intricate joinery, custom cabinetry, and detailed trim work, requiring an in-depth understanding and mastery of various tools and techniques.
Mastering the foundational skills in carpentry is paramount for anyone looking to delve deeper into the world of woodworking.
These skills not only provide the necessary technical knowledge but also instill a sense of patience and precision, qualities indispensable for achieving excellence in more specialized areas of woodworking.
The Precision and Elegance Of Cabinet Making.
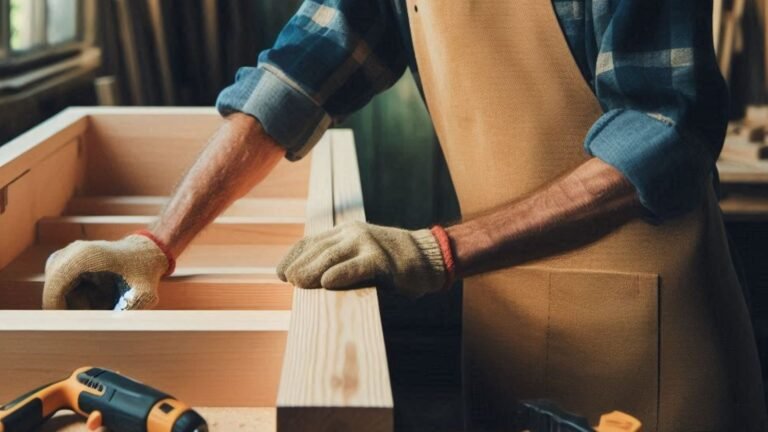
Cabinet making represents the pinnacle of woodworking precision and elegance. This intricate craft merges detailed joinery techniques, precise hardware installation, and the fine art of finishing, creating functional yet aesthetically pleasing pieces.
The process begins with meticulous planning and measurements, ensuring every component fits together seamlessly.
Attention to detail at this stage minimizes errors and enhances the overall quality of the finished product.
One of the cornerstones of cabinet making is joinery. Techniques such as dovetail, mortise-and-tenon, and biscuit joints not only provide structural integrity but also add to the visual appeal of the cabinetry.
Each method requires a steady hand and a keen eye for detail, underscoring the intermediate to advanced skill level necessary for this craft.
Mastery of these techniques is essential for creating durable and elegant cabinets that stand the test of time.
Hardware installation is another crucial aspect, where precision is paramount. Hinges, drawer slides, and handles must be aligned perfectly for smooth operation and a polished look. This step often involves using specialized tools and jigs to ensure accuracy.
The correct installation of hardware not only enhances functionality but also contributes significantly to the overall aesthetics of the cabinet.
The finishing process is the final touch that transforms a simple wooden structure into a piece of art.
Sanding, staining, and applying a protective finish are stages that require patience and a meticulous approach.
The choice of finish can dramatically alter the appearance of the wood, highlighting its natural beauty and grain patterns.
A well-executed finish not only protects the wood but also adds a layer of elegance, elevating the cabinet to a higher level of craftsmanship.
In essence, cabinet making is a harmonious blend of precision and artistry. It demands a deep understanding of woodworking principles and an unwavering commitment to excellence.
For those willing to invest the time and effort, the rewards are tangible in the form of beautifully crafted cabinets that showcase the true potential of woodworking.
Shaping the Unseen Via The Art of Woodturning.
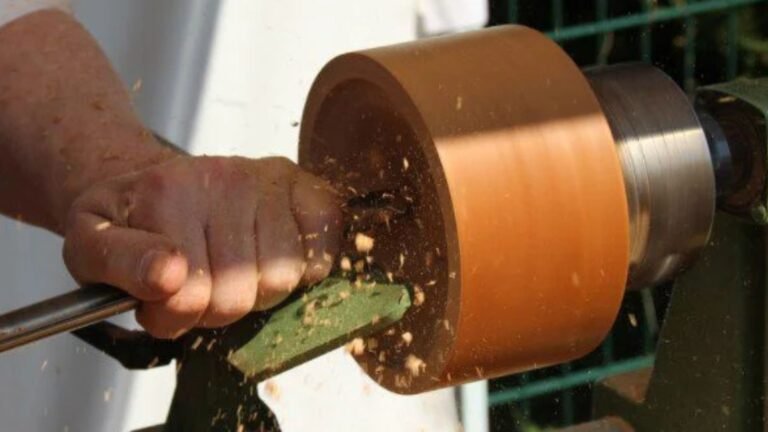
Putting it simply, the goal of woodturning is to create round objects. This could include spindles or discs that are turned between centres or on a faceplate. Turning differs from other woodworking techniques in that the wood rotates while the cutting tool (mostly) stays stationary.
Beech, hickory, ash, ebony, sycamore, yew, cherry, and rosewood are some of the easiest woods to turn. These woods are easy to work with, have fine grain, and are extremely flexible.
Depending on the project, a hardwood may be preferred over a softwood; the most common hardwoods used are birch, ash, maple, cherry, and walnut.
Woodturning is a sophisticated aspect of woodworking that requires considerable skill when shaping wood with a lathe to create symmetrical and intricate designs.
At its core, woodturning transforms a rough piece of wood into a polished, artistic object. This process requires precision, skill, and a deep understanding of both the tools and techniques involved.
The lathe is the central tool in woodturning. It holds and spins the wood while the turner uses various chisels and gouges to shape it.
The main three gouges I’ve ever used roughing, spindle and bowl and the most common chisels for woodturning are skew chisel, parting tool and scraper (flat or round nose).
Understanding the lathe’s components, such as the headstock, tailstock, and tool rest, is fundamental. Proper setup and maintenance of the lathe ensure not only the quality of the work but also the safety of the woodturner.
Two primary techniques define woodturning: spindle turning and faceplate turning. Spindle turning involves mounting the wood between the headstock and tailstock, allowing the turner to create elongated objects such as chair legs, pens, and balusters.
This technique requires finesse in controlling the chisel to achieve the desired symmetrical shapes and smooth finishes.
Faceplate turning, on the other hand, involves attaching the wood to a faceplate mounted on the headstock. This method is typically used for creating bowls, platters, and other hollow forms.
The challenge in faceplate turning lies in hollowing out the interior while maintaining even wall thickness and aesthetic appeal. Mastery of this technique opens the door to a wide array of complex and beautiful designs.
Woodturning is considered an intermediate to advanced skill within the woodworking realm. It demands patience, practice, and a keen eye for detail.
Each project starts with selecting the right wood, understanding its grain and properties, and then methodically shaping it while the lathe spins.
The turner’s ability to visualize the final piece and execute precise cuts is what ultimately brings the unseen beauty of the wood to the surface.
The Intricate Art of Joinery.

Joinery is a fundamental aspect of woodworking that exemplifies the intricate art of connecting pieces of wood to form strong, functional, and aesthetically pleasing joints.
Mastering various joinery techniques is essential for any woodworker aiming to create durable and elegant wooden structures.
The precision and craftsmanship required in joinery elevate it from a simple task to a sophisticated art form.
Among the myriad of joinery techniques, the mortise and tenon joint stands out for its strength and versatility.
This method involves inserting a tenon, a protruding piece of wood, into a mortise, a corresponding cavity, to form a tight, interlocking bond.
This technique is widely used in furniture making, where durability is paramount. Achieving a perfect mortise and tenon joint demands intermediate to advanced woodworking skills, as it requires meticulous measurement and cutting.
Another celebrated joinery technique is the dovetail joint, known for its unique interlocking design that provides exceptional tensile strength.
This method is often used in drawer construction, ensuring that the sides are firmly held together without needing additional hardware.
The dovetail joint’s intricate pattern not only adds structural integrity but also enhances the visual appeal of the piece.
Crafting perfect dovetail joints requires a high level of precision and practice, making it a hallmark of advanced woodworking expertise.
The lap joint, although simpler in design, is highly effective for joining pieces of wood at right angles.
This technique involves overlapping two pieces of wood and securing them together, providing a sturdy and reliable connection.
The lap joint is particularly useful in creating frames and other structural components. While it may appear straightforward, achieving a seamless lap joint necessitates careful planning and execution.
The dowel joint utilizes wooden dowels to join two pieces of wood, offering a combination of strength and simplicity.
This method is favored for its straightforward approach and accessibility, making it suitable for intermediate woodworkers. Proper alignment and drilling are critical to ensure a snug fit and a robust connection.
The art of joinery is a testament to the woodworker’s dedication, skill, and attention to detail. Each technique, from the robust mortise and tenon to the elegant dovetail, requires a deep understanding of wood properties and precise craftsmanship.
Mastering these joinery methods not only enhances the structural integrity of wooden creations but also elevates their aesthetic value, reflecting the true artistry of woodworking.
What is a Butt Joint?
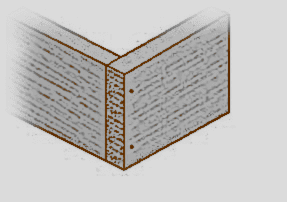
The Butt Joint is the most basic type of wood joinery; it is a method of joining two pieces of wood by simply putting their ends together without any shaping.
The butt joint is the easiest to build because it only requires cutting the material to the proper length and butting it together. A strong butt joint is secured with a combination of glue and fasteners (screws or nails).
What is a Tongue & Groove Joint?
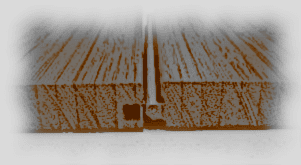
Tongue and groove is a means of connecting comparable objects together edge to edge and this connection securely joins two flat pieces to produce a single flat surface.
The tongue and groove junction is much stronger than a butt joint and it provides greater adjoining surface area, which is particularly useful if the connection will be glued.
The tongue aids in the alignment of the two parts for gluing, resulting in a clean finish. Tongue and groove construction is most typically used with wood in flooring, parquetry, panelling, and other related projects.
What is a Mitred Butt Joint?

A mitred butt joint is similar to a butt joint, except that it connects the two boards at a 45 degree angle (instead of square to one another) and the two ends come together to create a 90-degree corner with no exposed edges.
The advantage is that the end grain is hidden by the mitred butt joint, making it more aesthetically acceptable.
The disadvantage is that the mitred butt joint isn’t very strong.
Commonly used for door and window construction, cabinet building, box construction, picture frames, and many forms of mouldings.
What is a Half Lap Joint?
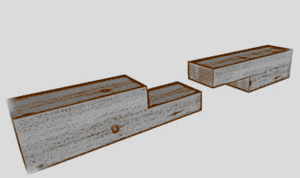
With the half-lap joint, half of each of the two boards being connected is removed, resulting in the two boards connecting flush.
Although this method of wood joinery weakens the two neighbouring boards, it is a stronger junction than butt joints.
In a variety of situations, the half-lap joint can be used to boost strength and aesthetic appeal.
Half-lap joints are widely used when dealing with framing lumber, especially on long lengths and at 90-degree crossings. They maintain a uniform wood thickness and flush mating surfaces.
What is a Mortise & Tenon Joint?
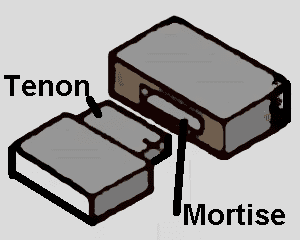
The mortise and tenon method is a traditional way of joining two pieces of wood by inserting one end of one piece of wood into the hole of another piece of wood. These connections have been used for thousands of years and are still one of the most elegant ways to join wood.
They are sturdy and stable. It’s quite popular because of the flush fitting end product. It takes some talent to accomplish well, but it’s aesthetically attractive if done correctly.
What is a Biscuit Joint?

The biscuit joint is a more advanced sort of butt joint that requires cutting slots in both sides of the wood pieces and then employing beechwood wafers/plates (known as biscuits) to hold them in place with the aid of glue.
When the glue is applied, the wafers swell and hold the boards in place with good strength and durability.
This is a very useful modern woodworking joint, particularly for making table tops. A biscuit joiner tool makes notches in both pieces of wood to be joined, and the biscuits are then inserted and glued in place.
What is a Pocket Joint?

A pocket joint involves cutting a slot and pre-drilling a hole at a 15 degree angle into one workpiece and then joining it to a second workpiece with a self-tapping screw. The pre-drilling needs to be very accurate, so it is typically accomplished by use of a jig.
You can use it to join two pieces of wood in just about any configuration and common uses include assembling structural frames and cabinet face frames.
What is a Rabbet Joint?
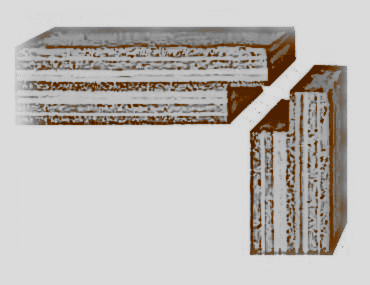
A rabbet joint is formed by cutting recesses into the edges of
both pieces of wood to form a lip and then joining them together into a groove.
Glue, nails, or screws are commonly used to fasten rabbet
joints, which are much stronger than basic butt joints.
A rabbet joint is frequently used to build shelving, cabinet
boxes, and furniture with panels, such as a small dresser.
What is a Dado Joint?
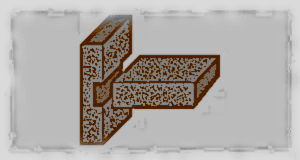
A dado joint is when we cut a square grooved slot or trench into the surface of one wood piece where the other wood piece is intended to fit.
Often used for cabinets and bookshelves. Dado joints are easy to make using a table saw or router.
What is a Dovetail Joint?

A dovetail joint is a joinery technique most commonly used in woodworking and it’s so very popular due to its resistance from being pulled apart.
The shape of the “tail and pin” in the joint make it nearly impossible to break and is commonly used to join the sides of a drawer to the front as well as cabinets, boxes and timber framing.
Glue is used to strengthen the joint but no fasteners are necessary.
There is a few different types of dovetail joints such as:
(1) Through dovetail.
(2) Half-blind dovetail.
(3) Secret mitred dovetail.
(4) Secret double-lapped dovetail.
(5) Sliding dovetail.
What is a Through Dovetail Joint?
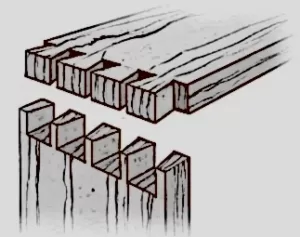
A through dovetail joint is where the end grain of both boards is visible where the joint is assembled, creating a nice dovetail effect from all sides of the box and is very strong.
What is a Half Blind Dovetail Joint?
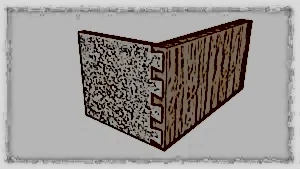
A half-blind dovetail junction allows the woodworker to hide the connection from the front end.
A drawer front is an excellent example of when one is utilized because you don’t want to see the end of the Through Dovetail on the drawer face.
So that their ends are hidden, the tails are stored in sockets in the ends of the board that will be the item’s front.
What is a Sliding Dovetail Joint?

Sliding dovetails are assembled by sliding the tail into the socket and is a method of joining two boards at right angles.
The sliding dovetail is a versatile joint with a lot of possible uses and provides the interlocking strength of a dovetail. Used for making furniture and cabinets.
What is Box Joint?
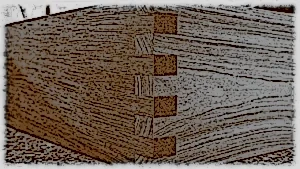
A box joint is a solid wood corner joint produced by cutting a series of complementary, interlocking profiles in two pieces of wood and then joining them at right angles, generally using glue.
The huge bonded surface area of the glued box connection results in a strong binding. It can be used to attach larger slats, boards, and complete wood panels. The box joints are cut parallel to one other and they are noticeable open joints.


[…] Tumblr Linkedin Instagram Slideshare Reddit Pinterest ← Previous PostNext Post […]