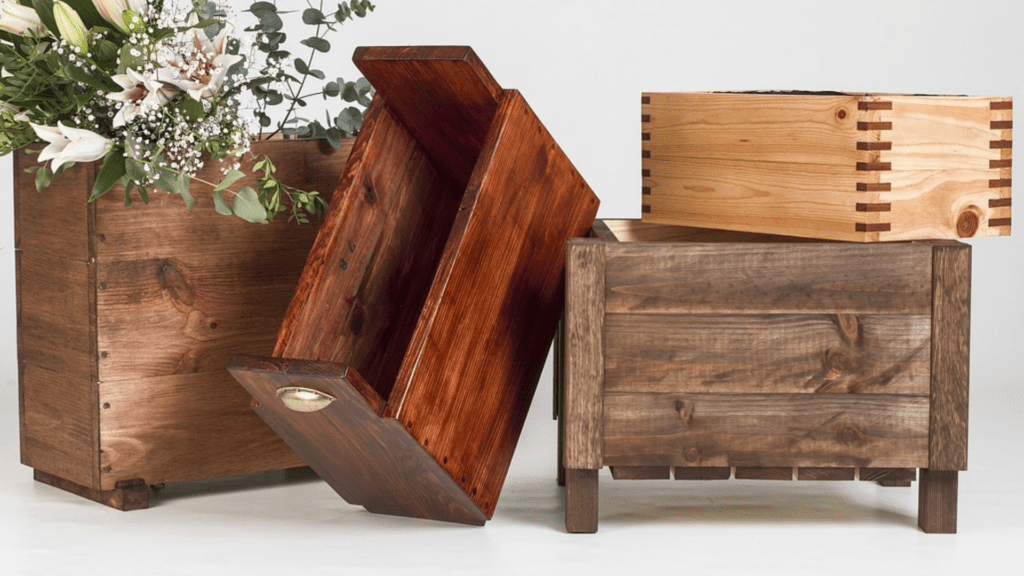
Create your own Wooden Raised Planter Boxes for the Garden
If you don’t have a lawn to decorate, it might be difficult to make your home or place of business look pleasant. Planter boxes have been a terrific solution to this problem since they allow you to grow intensively in a smaller space in a reasonable manner.
Planter boxes have the added benefit of being easy to maintain. They’re a popular choice for people who have problems bending over, digging, or completing other standard gardening duties due to limited mobility.
One of the most significant advantages of raised beds is the protection they provide from foot traffic, particularly from children working in the garden. The soil does not become compacted and plants are less likely to be injured because people work on the paths rather than walking in well-designed raised beds. Raised beds warm up faster and drain better in the spring (as long as you’ve got the soil prepared correctly), providing for a longer growth season and better growing conditions. A well prepared raised bed helps plant roots to breathe, which is especially important in the colder regions of our states.
Compaction is essentially non-existent once the soil in a raised bed has settled, thus seasonal tilling is not required. In a well-maintained and mulched raised bed, weed populations decline with time. A raised bed can allow crops to grow in areas that would otherwise be unsuitable for gardening. Raised beds can be used as terracing on steep slopes. On parking lots and other compacted, difficult-to-garden urban soils, raised beds can be erected. Raised beds can be altered to suit various crops that flourish in specific soils. Raised beds, at the proper height, can improve access for wheelchairs, or for gardeners who have a hard time bending over.
The bottoms of wooden planter boxes can be fragile and deteriorate quickly, necessitating repair on a regular basis. There are, however, things you can do to help protect them from decomposing and thereby lengthen their lives. The first thing to look for is enough drainage at the bottom of your planter box. If it doesn’t, you’ll need to drill a few holes to allow enough liquid drainage. Second, select a light-weight potting mix with adequate drainage. If you’re not sure what kind of potting mix to use, your local hardware shop or gardening centre can help.
Garden soil is not recommended since it is far too heavy and will compact, limiting appropriate drainage. Allow at least 2 inches of space for air circulation by placing your planter box on top of some bricks or pieces of wood. Similarly, avoid crowding your planter boxes together or against fences or walls, as this will hinder adequate air circulation.
Weatherproofing your Wooden Planter Box
Wood is a great choice for planter boxes
and it actually offers several benefits. For example, wood helps shield roots
from rapidly fluctuating temperature changes, a problem sometimes experienced
with plastic or metal planters. Due to natural appearance, wood planter boxes
blend in better with plants. If you can’t afford Cedar, Redwood or Oak and need
to use softwood (don’t use treated wood for planter boxes due to all the nasty
chemicals used), the untreated softwood planter boxes will decay when
constantly exposed water and the sun.
The
bottoms of wooden planter boxes are the most delicate and prone to rot,
necessitating continuous repair. Aside from sealing the entire planter box,
there are a few things you can do to keep them from degrading and hence extend
their life. The first thing to look for is enough drainage at the base of the
planter box. If not, you’ll need to drill a few holes to allow for enough
liquid drainage before sealing it.
Rough
up the entire surface with extremely coarse sandpaper (60-80 grit), giving it a
good hard rub; you want the surface to feel rough to the touch, as this will
produce little pockets and crinkles for your waterproofing agent to adhere to.
Seal
every seam and edge with a Wet Area UV, mould & weather resistant
caulk/sealant that doesn’t shrink or crack. Wait for the sealant to completely
dry before proceeding with the waterproofing. Complete sealant drying takes 2
or 3 days average when the box is stored in a cool, dry location away from
sources of moisture and heat.
If
you want to stain the wood first then that’s fine, do that and then wait a day
or so until it’s completely dry.
Apply
an initial thin coat of a marine grade polyurethane varnish to waterproof the
wood while also protecting it from the sun’s UV rays. Use a paintbrush dipped
in the varnish and then apply it with slow, even strokes and coat all surfaces
of the planter box (be careful of the fumes)
Wait
12 to 24 hours or whatever is the recommended recoat time, then, reapply the
varnish.
Good
quality varnishes should only require a couple of layers for full waterproofing
and UV protection, but some cheaper ones might require several coatings.