Plan And Build Yourself A New Cedar Woodwork Shed.
Building a new woodworking shed in your backyard is an
excellent way to increase your available workspace, improve the overall
functionality of your property, and, if approved by the council, add value to
your property.
When considering materials for this project, cedar wood stands
out as a superior choice.
Cedar’s durability ensures that your shed will withstand the
test of time, providing a robust structure that remains resilient against
various weather conditions.
This longevity is a significant advantage, making cedar a wise
investment for any woodworking enthusiast.
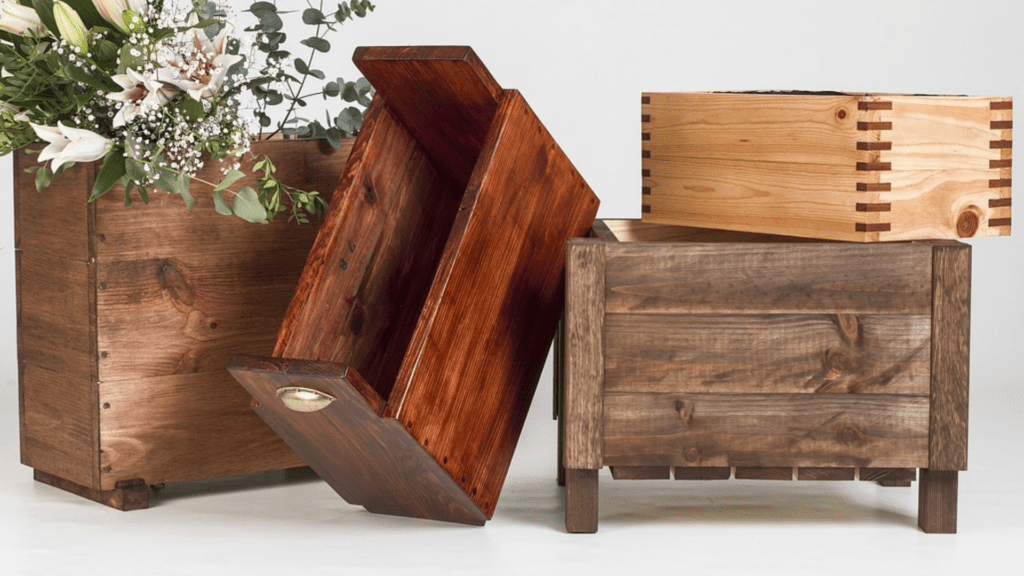
One of the most appealing aspects of cedar is its aesthetic
charm. Cedar wood’s rich, warm tones and natural grain patterns can blend
seamlessly with any backyard environment, adding a touch of elegance to your
outdoor space.
Whether your backyard is a landscaped oasis or a more rustic
setting, a cedar shed can elevate its overall visual appeal, making it not
merely a functional addition but also a focal point of beauty.
Cedar’s natural resistance to insects and decay further
underscores its suitability for outdoor structures.
Unlike other types of wood that may require frequent
treatments with chemicals to ward off pests and rot, cedar contains natural
oils that deter insects and resist fungal growth.
This inherent resistance means less maintenance for you,
allowing you to focus more on your woodworking projects and less on the upkeep
of your shed.
A cedar woodworking shed can significantly enhance the
usability of your backyard. It provides a dedicated space for your tools and
projects, keeping your main living areas clutter-free.
This separation of spaces can lead to increased productivity
and a more organized approach to your woodworking endeavors.
Additionally, the shed can serve multiple purposes, such as a
storage area for garden tools or a serene retreat for hobbies beyond
woodworking.
In summary, opting for a cedar shed offers numerous benefits,
from its durability and aesthetic appeal to its natural resistance to pests and
decay.
As you embark on building your woodworking shed, choosing
cedar will not only ensure a long-lasting structure but also enhance the beauty
and functionality of your backyard.
Planning and Designing Your New Cedar Woodwork Shed.
Before embarking on the construction of your cedar woodworking
shed, meticulous planning and design are paramount.
This foundational stage will determine the overall
functionality and aesthetic appeal of your shed, ensuring that it meets all
your woodworking needs.
The first step is to choose the right location in your
backyard. Factors such as sunlight, accessibility, and available space should
be carefully considered.
An ideal spot would receive ample natural light, be easily
accessible from your home, and provide enough room for construction and future
use.
Designing the shed to accommodate your woodworking activities
is essential. The dimensions I like are 6 meters long, 4 meters wide, and 3.5
meters high as they are particularly suitable for a woodworking space.
These dimensions offer ample room for various woodworking
tasks, including cutting, assembling, and finishing projects. Additionally,
they provide sufficient height for comfortable movement and storage of long
materials.
When planning the interior, consider incorporating storage
solutions that will keep your tools organized and easily accessible.
Shelving units, pegboards, and tool cabinets can help maximize
space and maintain order.
Including a sturdy workbench is also crucial, as it will serve
as the primary workspace for your projects.
Ensure that the workbench is positioned to take advantage of
natural light and is easily accessible from all sides.
Ventilation is another critical aspect of the design. Proper
airflow will not only make the workspace more comfortable but also help prevent
the buildup of dust and fumes, which can be harmful over time.
Incorporating windows that can be opened, along with strategically
placed vents, will enhance the ventilation system.
By carefully planning and designing your cedar woodworking
shed, you can create a functional, efficient, and pleasant workspace that will
serve you well for years to come.
Gathering Materials and Tools.
Building a cedar woodworking shed requires careful planning
and the right materials and tools to ensure a sturdy and aesthetically pleasing
structure.
The primary material for this project is, of course, cedar
wood. Cedar is known for its durability, resistance to rot, and natural beauty,
making it an excellent choice for outdoor structures.
You will need cedar wood planks for the walls, floor, and
roof. Ensure that you select high-quality, knot-free cedar to achieve the best
results.
In addition to cedar wood, you will need nails, screws, and
wood glue to assemble the shed.
For the foundation, a concrete mix is essential to provide a
stable base. Roofing materials such as shingles or metal sheets are also
required to protect your shed from the elements.
You can purchase these materials from local hardware stores or
specialized lumberyards. It’s advisable to compare prices and quality to get
the best value for your investment.
Essential woodworking tools for this project include a saw
(circular or miter), a hammer, a drill, a tape measure, and a level.
A carpenter’s square is crucial for ensuring right angles, and
clamps will help hold pieces together while the glue dries.
For a more polished finish, consider using a sander. Investing
in good-quality tools can significantly impact the ease and precision of your
work.
Safety should never be overlooked. Equip yourself with gloves
to protect your hands from splinters and cuts, goggles to shield your eyes from
wood dust and debris, and ear protection to safeguard against the noise from
power tools.
Safety gear is readily available at most hardware and safety
supply stores.
By carefully gathering all the necessary materials and tools,
and prioritizing safety, you set a solid foundation for successfully building
your cedar woodworking shed. Proper preparation is key to a smooth and
enjoyable woodworking experience.
Laying the Foundation.
Establishing a robust foundation is a crucial first step in
building a cedar woodworking shed. A well-prepared base ensures the longevity
and stability of the structure.
There are several types of foundations to consider, each with
distinct advantages. The most common options are concrete slabs and wooden
beams, both of which provide durable support.
To begin, select an appropriate location for your shed. Clear
the area of any debris, rocks, or vegetation.
Next, mark the perimeter of the shed using stakes and string,
ensuring the layout is square by measuring the diagonals.
The ground must be leveled; use a shovel and rake to achieve a
flat surface, checking with a level tool frequently during this process.
For a concrete slab foundation, dig a trench around the
perimeter, about 6 to 8 inches deep.
Fill the trench with gravel to a depth of 4 inches, compacting
it thoroughly. Construct a wooden frame to contain the concrete, ensuring it
matches the dimensions of your shed.
Mix and pour the concrete into the frame, smoothing it out
with a trowel. Allow the concrete to cure for at least 24-48 hours, after which
you can remove the framing.
A wooden beam foundation requires a different approach. Begin
by placing concrete blocks at each corner and at intervals along the perimeter.
These blocks should be level and aligned with the shed’s
layout. On top of these blocks, position treated wooden beams, ensuring they
are level and securely attached.
These beams will provide a stable base for the shed floor.
Regardless of the foundation type, it is imperative to
double-check the level and stability before progressing. A solid, level foundation is the cornerstone
of a well-built cedar woodworking shed, ensuring that the structure remains
secure and functional for years to come.
Framing the Shed Structure.
Constructing the frame of your cedar woodworking shed is a
crucial step that ensures the overall stability and longevity of the structure.
Begin by meticulously measuring the dimensions for the walls,
roof, and floor frame. Precise measurements are foundational to a successful
build and will prevent future alignment issues.
Start with the floor frame. Use treated lumber to create a
sturdy base that resists moisture and decay.
Measure and cut the beams according to your shed dimensions,
ensuring they fit perfectly. Assemble the floor frame by securing the beams
with galvanized screws or nails, forming a robust rectangular base.
Next, move on to the walls. Cut the vertical studs and
horizontal beams to the required lengths.
It’s advisable to use a miter saw for precision. Assemble the
wall frames on a flat surface, ensuring that all joints are square and secure.
Reinforce the corners and intersections with metal brackets or
plates to enhance durability.
For the roof frame, cut the rafters according to the desired
pitch of the roof. The angle of the cuts is vital for a perfect fit.
Assemble the rafters on the ground first to check for accuracy
before lifting them into place.
Attach the rafters to the top plate of the wall frames,
ensuring they are evenly spaced and securely fastened.
Throughout the framing process, double-check all measurements
and use a level to maintain alignment.
Accurate measurements and sturdy joints are paramount to the
structural integrity of your cedar woodworking shed.
By taking the time to measure, cut, and assemble each
component with care, you ensure the shed’s frame will provide a strong
foundation for the rest of the construction process.
Installing the Roof and Walls Of Your Shed.
Once the foundation and frame of your cedar woodworking shed
are established, the next crucial step is installing the roof and walls.
To begin, select high-quality cedar planks for the walls.
Cedar is not only durable but also resistant to insects and decay, making it an
excellent choice for outdoor structures.
Start by measuring and cutting the cedar planks to fit the
dimensions of your shed’s frame.
Begin attaching the planks from the bottom up, ensuring each
plank overlaps the one below by at least one inch to provide adequate water
runoff. Use galvanized nails or screws to secure the planks, as these are
resistant to rust and corrosion.
Ensure the walls are aligned correctly by using a level and
check periodically as you progress.
For the roof, you have several options, including shingles,
metal roofing, or cedar shakes.
Each material has its advantages: shingles are cost-effective
and easy to install, metal roofing is highly durable and long-lasting, while
cedar shakes offer a rustic and natural appearance. Choose the roofing material that best suits
your aesthetic and functional needs.
If you opt for shingles or cedar shakes, start from the bottom
edge of the roof and work your way up, overlapping each row to ensure proper water
drainage.
For metal roofing, follow the manufacturer’s instructions for
installation, which typically involves securing the panels to the roof frame
with screws and sealing any seams to prevent leaks.
After installing the roof and walls, double-check that all
components are securely fastened and properly aligned.
This will ensure the structural integrity of your cedar
woodworking shed and provide a sturdy, weather-resistant shelter for your
projects.
Adding Your Shed Doors, Windows and Ventilation.
Incorporating doors and windows into your cedar woodworking
shed is essential for both functionality and aesthetic appeal.
Begin by selecting a door that matches the style and
dimensions of your shed. A sturdy cedar door is recommended for its durability
and resistance to weather elements. Ensure
the door frame is plumb and square before proceeding with the installation.
Use high-quality hinges to support the door’s weight and
ensure smooth operation. Stainless steel or galvanized hinges are ideal choices
as they are resistant to rust.
Secure the hinges to the door frame with screws, maintaining
equal spacing for balanced support.
Consider adding a robust lock and handle for security
purposes. A deadbolt lock offers enhanced protection, while a handle with an
ergonomic design ensures ease of use.
Windows are not only a source of natural light but also
enhance the shed’s ventilation. Select windows that complement the overall
design of the shed, ensuring they are of appropriate size and style.
Position the windows strategically to maximize natural light
and airflow. Installing windows with double glazing can improve insulation and
reduce energy costs.
Secure the windows with durable frames, and use weather-stripping
to prevent drafts and moisture ingress.
Proper ventilation is crucial in a woodworking shed to prevent
the buildup of fumes and dust, ensuring a safe and comfortable working
environment.
Consider installing louvered vents on opposite walls to
facilitate cross-ventilation. These vents allow fresh air to circulate while
expelling stale air.
Alternatively, small windows can be used as ventilation
points, provided they can be securely fastened and opened as needed.
Incorporating these elements into your cedar woodworking shed
not only enhances its functionality but also adds to its overall appeal.
By carefully selecting and installing doors, windows, and
ventilation systems, you create a well-lit, secure, and breathable workspace
that will serve your woodworking projects efficiently.
Finishing
Touches On Your Shed and Regular Maintenance Tips.
Once the primary structure of your cedar woodworking shed is
complete, adding the finishing touches enhances both its functionality and
aesthetic appeal. One of the first
considerations should be painting or staining the cedar wood.
While cedar is naturally resistant to decay and insects,
applying a high-quality stain or paint can further protect the wood from
weather elements, extending the longevity of your shed.
Opt for a stain that complements your backyard’s landscape, or
choose a paint color that harmonizes with your home’s exterior.
Inside the shed, consider installing shelving and storage
solutions to maximize space and keep your tools organized.
Customizable shelving units can accommodate various
woodworking tools and supplies, ensuring that everything has its place.
Pegboards and wall-mounted racks are also practical options
for hanging frequently used tools, making them easily accessible while you
work.
Regular maintenance is crucial for preserving the quality and
appearance of your cedar shed. Start by cleaning the exterior periodically to
remove dirt, mildew, and debris.
A mild detergent solution works well for this purpose. Rinse
thoroughly with water and allow the shed to dry completely.
Inspect the wood for any signs of damage or wear, such as
cracks or splinters, and address these issues promptly to prevent further
deterioration.
Sealing the cedar wood is another critical step in shed
maintenance. A good sealant will protect against moisture penetration, which
can cause warping and rotting over time.
Reapply the sealant every few years or as needed, depending on
your local climate and the exposure your shed faces.
Additionally, check the roof for leaks or damage, and repair
or replace shingles as necessary to maintain a watertight environment inside
the shed.
Regular upkeep of your cedar woodworking shed not only ensures
its durability but also maintains its visual appeal, adding value to your
property.
By investing time in proper maintenance, you can enjoy the
benefits of a well-functioning and attractive shed for many years to come.
Getting Your Local
Council Approval For Your Shed.
Firstly, if you want to avoid building a shed that’s probably
going to require council approval, then be sure not to exceed the size limits
for structures in your area.
This way you should be able to build a shed without approval
under the “exempt development” category.
However, the exact limits naturally vary based on specific
local regulations. Generally, for a shed or outbuilding, the typical exempt
development limits are Maximum floor area: 20 square meters & Maximum
height: 3 meters.
To build without approval, keep your shed size under these
limits.
For example, you could build a shed that’s 4m x 5m (20 square
meters) and no taller than 3m at its highest point.
I strongly recommend you verify these limits directly with your
Local Shire Council, as they may have specific local variations or additional
requirements.
Some factors that could affect these limits include:
1.
Your property’s zoning.
2.
Distance from boundaries.
3.
Heritage considerations.
4.
Bushfire prone areas.
For the most accurate and up-to-date information, it’s best to
check with your Local Shire Council website for their specific exempt
development criteria and probably follow that up with a phone call.
Council Approval For A 6m x 4m x 3.5m Shed.
To get council approval for your woodworking shed in your
local Shire Council, below are some steps you’ll need to follow:
1.
Check
zoning regulations: Ensure your property is zoned for such
structures.
2.
Determine if you need approval: I’m
pretty sure that for most councils the dimensions of 6m x 4m x 3.5m, will likely
require approval as it exceeds most council size limits that I know of where development
exemption might be possible.
3.
Prepare
documentation: You’ll need to produce a Site plan showing: The
proposed location of the shed, Detailed plans and elevations of the shed, Specifications
of materials (cedar in this case) and storm-water drainage plans (you might
need help from a plumber with this part).
4.
Complete
the application: Fill out
a Development Application (DA) form, Include all required documentation and
then pay the applicable fees.
5.
Submit
the application: Lodge
your application with your Local Shire Council, either online or in person.
6.
Wait
for assessment: The
council will review your application and they may request additional
information.
7.
Receive
determination: If approved, you’ll receive a Development
Consent and you may need to obtain a Construction Certificate before starting
work.
For the most up-to-date and accurate information, visit Your
Local Shire Council website, contact their planning department directly and considering
a pre-lodgment meeting with a council planner to discuss your project.