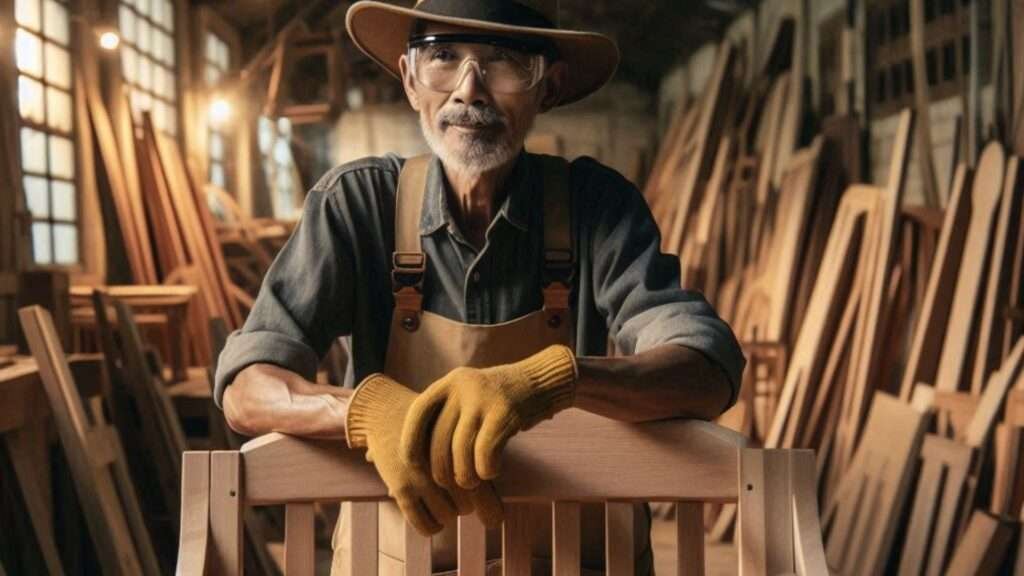
The Process Of Replacing Wooden Fascia Boards.
Wooden fascia boards have a rich history, rooted deeply in the
evolution of architectural design.
Gothic and Romanesque architectural styles, characterized by
steeply pitched roofs and elaborate eaves, necessitated more sophisticated
fascia systems.
Craftsmen began to incorporate decorative elements into these
boards, blending utility with aesthetic appeal.
This period saw the introduction of intricate carvings and
detailed moldings, which not only protected the roofline but also contributed
to the overall architectural beauty.
The Renaissance era marked another significant evolution in
the design and application of wooden fascia boards.
With the revival of classical architecture, there was a
renewed focus on symmetry, proportion, and detail.
Fascia boards during this time were often adorned with
classical motifs and elaborate cornices, reflecting the grandeur and elegance
of Renaissance buildings.
In the 19th and early 20th centuries, the Industrial
Revolution brought about major changes in construction materials and methods.
Mass production techniques allowed for standardized fascia
boards, making them more accessible to a wider range of buildings.
Despite the advent of new materials such as metal and vinyl,
wood remained a popular choice due to its versatility and traditional appeal.
Modern construction has continued to innovate, with wooden
fascia boards evolving to meet contemporary needs.
Advances in wood treatment and protective coatings have
extended the lifespan and durability of these boards, ensuring they remain a
viable option for modern homes.
Today’s wooden fascia boards blend traditional craftsmanship
with modern technology, offering both functional and aesthetic benefits.
The Anatomy
of Wooden Fascia Boards.
Wooden fascia boards are integral components of a building’s
roofing system, serving both functional and aesthetic purposes.
These boards are typically positioned along the roofline,
providing support for the lower edge of roof tiles or shingles and concealing
the ends of rafters.
Understanding the materials and construction of wooden fascia
boards is essential for making informed decisions about their replacement.
Fascia boards can be crafted from various types of wood, each
offering distinct advantages.
Commonly used species include pine, cedar, and redwood. Pine
is a popular choice due to its affordability and workability, though it
requires proper treatment to resist moisture and insect damage.
Cedar, on the other hand, is naturally resistant to decay and
pests, making it a durable option for fascia boards.
Redwood shares similar properties with cedar, boasting
excellent durability and resistance to the elements, albeit at a higher cost.
The manufacturing process for wooden fascia boards involves
selecting high-quality timber, which is then cut to standard dimensions.
Fascia Boards are often kiln-dried to reduce moisture content,
preventing warping and shrinking over time.
Additionally, they may be planed to a smooth finish to enhance
their appearance and facilitate painting or staining.
To extend the lifespan and maintain the aesthetic appeal of
wooden fascia boards, various treatments and finishes are applied.
Pressure treatment with preservatives helps protect the wood
from fungal decay and insect (termite) infestation.
Surface treatments, such as priming and painting, provide an
additional layer of protection against moisture and UV damage.
Staining is another popular option, allowing the natural
beauty of the wood grain to show through while offering some level of
protection.
The choice of wood species, manufacturing process, and
treatments significantly impact the performance and longevity of wooden fascia
boards.
By selecting the right materials and applying appropriate
finishes, homeowners can ensure that their fascia boards not only enhance the
curb appeal of their property but also withstand the rigors of the environment.
Wooden Fascia
Boards Have A Limited Life.
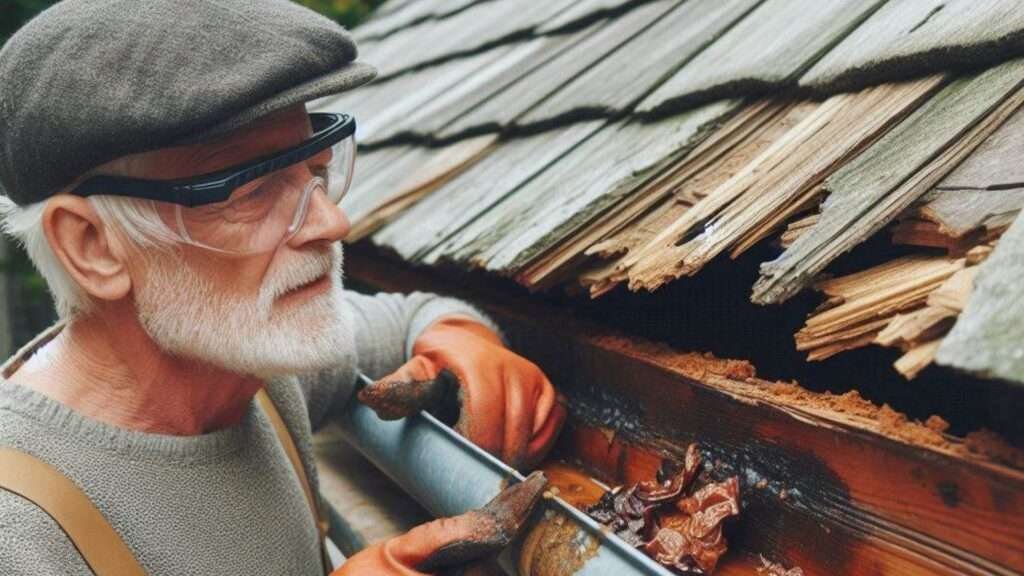
Fascia Boards run horizontally on the edge of the roof,
typically behind the gutters on a home and are one of the most typical sites
for rot on a house.
They are of particular importance as they link to the roof
truss and offer a mount for the gutters.
They are especially susceptible to water intrusion because
they are located directly beneath the roofline.
In a lot of situations, once the fascia boards are damp, they
will begin to rot quickly. A degraded fascia might end up being the source of
additional roof issues, therefore it’s critical to replace them once they are
deteriorated.
Fascia boards can be made from a variety of woods, including
Spruce, Pine, Fir, Cedar, Cypress, or Redwoods.
However, given the risk of rot and if your budget allows it,
you might be better off going with Cedar, Cypress, or Redwoods, as their
properties are much better for use as a Fascia Board and better resist
moisture, even if you don’t paint them.
Wooden fascia boards should generally be painted with an
external acrylic coating that is long-lasting, self-priming, and mildew
resistant; you want something that will last a little longer than standard
exterior paint.
Roof leaks, gutter clogs, and a problematic roof design are
just a few of the ways your fascia boards can be damaged.
If your fascia boards get wet too often, mould, fungus, and
algae can grow and damage them. Fascia’s can also crack as a result of repeated
temperature changes and ageing. Even nail sized holes in your fascia should be
sealed up.
If the afflicted region spans two rafters and can be safely
re-secured, you may be able to repair a part of your fascia rather than
replacing the entire board by cutting away the affected area.
If the board has two points of contact with the rafters, it
should be able to support your gutters as well.
A fascia board that shows signs of ageing, such as bowing and
cracking, should be completely replaced, even if portion of it appears to be
salvageable, as it may fail shortly.
Non Wooden Fascia Boards Are Also Available
And Will Last Longer.
Fascia’s can also be manufactured from composite wood
products, which are more resistant to water and moisture than solid wood, plastic
and PVC can be used to make fascia boards and they perform admirably.
Considerations Prior To Replacing Wooden Fascia Boards.
When embarking on the task of replacing fascia boards,
selecting the right material is a critical step that can influence both the
aesthetics and durability of your home’s exterior.
The first consideration should be the size and thickness of
the fascia boards. It’s essential to match the dimensions of the original
boards to ensure a seamless fit and maintain the structural integrity of your
roofing system.
Fascia boards lengths are typically 3 to 5 metres long (10ft
to 16 ½ ft), as for thickness, they typically come in a range of thicknesses,
but the most common thicknesses are 1 inch (25 mm) and 3/4 inch (19 mm) thick and the most common
widths are 6 and 8 inches.
The choice of wood species is another important factor.
Popular options include cedar, redwood, and pine.
Cedar and redwood are highly regarded for their natural
resistance to decay and insect damage, making them ideal for outdoor use.
Pine, although more economical, requires additional treatment
to enhance its durability. Each wood type offers distinct aesthetic qualities,
with cedar and redwood providing rich, warm hues and pine being more versatile
for painting or staining.
Color and finish considerations play a significant role in the
overall look and longevity of your fascia boards.
Pre-finished boards can save time and labor during
installation, while unfinished boards allow for a customized finish that
matches your home’s existing trim. Protective finishes, such as paint or stain,
are crucial in safeguarding the wood against moisture and UV damage.
It’s advisable to choose high-quality finishes that offer
long-lasting protection to minimize maintenance efforts.
Cost implications vary widely based on the wood species, board
sizes, and finish options. While cedar and redwood may have higher upfront
costs, their longevity and reduced maintenance can offer better value over
time.
Pine, being more affordable, can be a budget-friendly choice
if treated properly. Balancing quality with budget constraints involves
evaluating the long-term benefits of durable materials against the initial
investment.
Selecting the ideal replacement wooden fascia boards requires
careful consideration of multiple factors.
By evaluating size, wood species, color, finish, and cost, you
can make an informed decision that enhances the appearance and durability of
your home’s exterior.
The Process Of Replacing Wooden Fascia Boards.
Replacing wooden fascia boards is a task that, with the right
tools and knowledge, can be accomplished by most homeowners.
The following steps will guide you through the entire process,
ensuring a professional and durable finish.
A Note About Safety Regarding Replacing Fascia Boards.
Replacing fascia boards is a difficult chore for the average
homeowner and should probably be avoided.
The main reason for this is that you are working at heights and this
work is substantially risky that could result in significant injury if you
fall.
Ensuring safety during the replacement of wooden fascia boards
is paramount and proper preparation and the use of appropriate safety measures
can significantly reduce the risk of accidents and injuries.
To begin with, it is crucial to have a stable and secure
working platform. Scaffolding is highly recommended over ladders, as it
provides a larger surface area to work from and reduces the likelihood of
falls.
To be safe when working at heights, you must be able to have
both your hands free to use with both feet planted securely on a level surface
to do it safely. Consider hiring or
purchasing pre-made scaffolds from your local hardware shop, or rent specific
height platform ladders.
Ensure that the scaffolding is correctly assembled on a flat,
stable surface and double-check all connections before use.
Wearing a safety harness is another essential precaution. A
harness, when properly used, can arrest falls and prevent serious injuries.
It is important to secure the harness to a reliable anchor
point that can support your weight.
Additionally, safety glasses, gloves and non-slip footwear can
provide further protection against potential hazards associated with replacing
fascia boards.
When removing old fascia boards, take care to use the right
tools and techniques to avoid damage to the underlying structure.
Typically, you’ll use a pry bar or crowbar to gently loosen
the boards, so be mindful of any nails or screws that may be protruding.
If using power tools to cut up your new lengths prior to
fitment, ensure they are in good working condition and follow the
manufacturer’s safety instructions.
Although most circular saws are guarded, just be sure to always
keep your hands and fingers away from cutting blade.
Preparing To Replace Old Wooden Fascia Boards.
1.
Assess the Condition: Before
starting the removal process, carefully inspect the fascia boards to ascertain
their condition.
a.
Look for evidence of damage, rot, or insect
infestation.
b.
Instead of attempting repairs, it might be
necessary to replace the entire length of the boards if they have severely
deteriorated.
2.
Gather everything you will need: Some of
the things you will need are a dust mask, gloves, and safety glasses.
a.
Also, to maintain stability and safety when
working at heights, use a ladder or scaffolding. You’ll need a hammer to remove nails.
b.
A Pry bar to loosen and remove fascia boards.
c.
To cut the new fascia boards to size with a
handsaw or circular saw.
d.
You’ll also need other items such as a tape
measure, nails, screws, stain or paint.
3.
Safety Precautions: Put safety
first before starting this work: Put on safety gear to shield yourself from
dust and debris.
a.
Verify the stability and security of the
scaffolding or ladder.
b.
If at all possible, collaborate with a partner,
particularly when working at heights or with a ladder.
c.
Pay attention to any potential hazards, such as
electrical wires, in the vicinity. Removing
the Old Fascia Boards.
Steps For Removing The Old Wooden Fascia Boards:
1.
Using the pry bar, start at one end and gradually
pry the fascia board from the rafters.
2.
Pry the board away from the rafters as you work
your way down its length, taking out any nails in the process.
3.
After the board is fully detached, carefully lower
it from the ladder or scaffolding.
4.
Examine the underlying structure for any rot or
damage that may need to be repaired before putting the new boards in place.
Installing New Wooden Fascia Boards.
1.
Determine the length of the new fascia board by
measuring and cutting it.
2.
To guarantee a stable and uniform installation,
screw or nail the new board to the rafters.
3.
Continue the process the entire length, making
sure that every board is level and positioned correctly.
The Finishing
Touches Of Replacing Fascia Boards.
1.
Once all of the new fascia boards are in place,
it’s time to finish them off:
2.
Sand any visible nail or screw holes smooth with
wood putty.
3.
Paint or stain the wood to protect it from the
elements and to match the overall look of your home.
Common Challenges
With Fascia Board Replacements.
Replacing fascia boards can present several challenges that
homeowners and professionals may encounter.
Understanding these common issues and having practical
solutions at hand can make the process more efficient and successful.
One of the primary challenges is dealing with rotted or
damaged fascia boards. Before replacement, it’s crucial to thoroughly inspect
the existing fascia for any signs of rot or damage.
If rot is present, remove all affected areas completely to
prevent future deterioration.
Another common issue is ensuring a seamless fit during
installation. Fascia boards must be cut precisely to fit the dimensions of the
roofline.
Use a tape measure to get accurate measurements and mark the
wood carefully before cutting. Utilizing a miter saw can help achieve clean,
precise cuts. If the fascia boards are not fitting snugly, consider using a
wood filler to close any small gaps, ensuring a secure and seamless fit.
Troubleshooting installation problems can also arise, such as
boards not aligning correctly or nails not holding securely. To address these
issues, double-check that the rafters and roofline are even.
Use high-quality, rust-resistant nails or screws to secure the
fascia boards firmly. Additionally, it may be beneficial to pre-drill holes to
prevent the wood from splitting during installation.
Maintaining the new fascia boards to prevent future issues is
equally important. Regular inspections and timely maintenance can significantly
extend the lifespan of fascia boards.
Apply a water-resistant sealant or paint to protect the wood
from moisture and weather damage.
Clean the gutters regularly to prevent water overflow that can
damage the fascia. Moreover, trimming back any overhanging branches can reduce
the risk of physical damage.
By addressing these common challenges and implementing these
solutions, the process of replacing fascia boards can be more manageable,
ensuring the newly installed fascia boards remain in excellent condition for
years to come.
Maintain Newly
Installed Wooden Fascia Boards.
Proper maintenance of new wooden fascia boards is essential to
ensure their longevity and aesthetic appeal.
Routine maintenance tasks, such as cleaning and repainting,
play a crucial role in the preservation of these architectural elements.
Firstly, regular cleaning is imperative. Dust, dirt, and
debris can accumulate on fascia boards, leading to moisture retention and
potential damage.
If you’re very keen on keeping them in great condition, you could
clean your fascia boards about twice a year using a soft brush and a mild
detergent solution. This simple step can prevent the buildup of harmful
elements that may compromise the wood’s integrity.
Repainting is another key maintenance task. Over time, the
paint on wooden fascia boards can peel or fade due to exposure to the elements.
Repainting not only enhances the appearance but also provides
a protective barrier against moisture and pests.
I think it’s probably best to repaint your fascia boards every
3-5 years or of course, whenever signs of wear become noticeable.
Before applying a new coat of paint, ensure the surface is
clean and dry, and consider using a primer to improve paint adhesion and
durability.
Addressing minor repairs promptly is crucial in preventing
more significant issues. Small cracks or holes can allow moisture to penetrate
the wood, leading to rot or pest infestations.
Inspect the fascia boards regularly for any signs of damage
and repair them immediately. Use wood filler for small cracks and holes, and
sand the area smoothly before repainting.
Protecting the wooden fascia boards from the elements is also
essential. Consider installing gutters and downspouts to direct water away from
the fascia.
Additionally, applying a water-repellent sealant can provide
an extra layer of protection against moisture. Ensure proper ventilation in the
attic to prevent condensation from affecting the fascia boards.
To prevent rot and pest damage, it is important to use treated
wood or apply a wood preservative. Regularly inspect for signs of rot or pests,
such as termite tracks or soft spots, and take immediate action if any are
found.
You can significantly extend the lifespan of your wooden
fascia boards by looking after them, with a little bit of regular maintenance
they can last you for years to come.