Learn The Creative Art Of Woodcarving
Wood carving is a common and very rewarding method of woodworking in which a cutting tool, such as a chisel, is held in one hand and a mallet is held in the other to carve a wooden figure, figurine, or sculpture in the other.
Woodcarving, one of the first kinds of art, has been practised by people of all civilizations since the Stone Age and is gaining in popularity. Wood was utilised to produce masks, statuettes, religious artefacts, and ordinary decorative objects.
Anyone can try their hand at wood carving. It is a popular activity that has spread across the globe. Some people carve wood for leisure, while others carve wood for a living. Woodcarving, whatever its aim, is a craft that relies heavily on your imagination.
Woodcarving is divided into several styles, each with its own set of techniques, tools, and styles. To acquire the necessary techniques and tools, you must first decide which path you want to take.
I go over some of the different types of woodcarving later in this article, but the main ones are chip, relief, Scandinavian flat-plane, lovespoon, treen, whittling, chainsaw, and Florentine.
Learning how to carve wood by hand entails using a variety of tools and techniques to transform a raw piece into a finished carved object.
Traditional carving tools like chisels, knives, gouges, and hammers are used, as well as sanding, painting, and other methods to finish your piece.
A wood carver can use a variety of basic wood carving techniques and skills to complete a project from start to completion.
Wood carving is unquestionably a great way for new woodworkers to kick things off. Wood carving requires only a very small amount of room.
It’s quiet, so you can carve at your apartment or at home rather than going to a specialised shop.
It’s also inexpensive because you just need a few tools to get started.
Wood carving can take many different forms depending on the cutting method and equipment utilised.
What Type Of Wood Should I Use?
The first step in any carving project is to decide what wood you want to work with. Knowing which wood to use for the best results will save you time and increase your eagerness to learn more.
So, before you begin carving, you should learn about the best woods for wood carving, how to properly prepare the wood, and what wood carving methods and procedures may be best for different types of wood.
In general, the best wood for woodcarving is lime wood/basswood because it is ideal for intricate carving and works exceptionally well with hand tools.
White walnut, yellow pine, or any of the Southern pine group of trees, maple, oak, or any of the 13 types of ash would come in second.
What Woodcarving Tools Will I Require?
When choosing the correct equipment, never spend money on things you don’t need unless you know how and when you’ll utilise them.
Wood carving tools can be used for a variety of purposes.
So, before you do anything, develop a good understanding of what tools you’ll need and how they’ll be used.
Visit my TOOLS & EQUIP page or my recent post on USING WOODWORKING HAND TOOLS to learn more about wood carving tools.
Use A Carving Pattern When You Are Learning.
When learning woodcarving, you’re far better off to always follow a plan/pattern; either draw one up or obtain one. You’re carving pattern will determine any measurements and where cuts should be made.
If you do a bit of research you’ll find that there’s plenty of wood carving patterns available. Give carvingjunkies.com a try, here’s one of their tutorials for carving a moose; I think it’s a fantastic level of detail.
When carving, always wear gloves because you will be working with very sharp blades, cutting and shredding tools, and a variety of other pointy objects that can cause injury. As a result, it is best to wear gloves on both hands.
When you’ve mastered wood carving, you’ll be able to work without gloves to achieve precise details that gloves make difficult.
Beginners, however, should cut wood while wearing gloves at all times.
What Type Of Woodcarving Will I Do?
Anyone with a reasonable level of skill can progress to wood carving for artistic purposes once they’ve gained some experience, learned the fundamentals, and experimented with some simple projects.
To do it well, you need time, talent, technique, and the right supplies. Some carving projects are quick to complete, while others take more time and care.
What is Knife Carving/Whittling
The oldest type of woodcarving is whittling/knife carving, and it involves carving the wood with only straight or curved/hook shaped knives. Whittling is a good craft for beginners or for someone that is just looking to occupy their time. In a nutshell, it’s just repeatedly shaving off slithers of wood until you get the creation you’re after.
Most people will almost always use softwoods for whittling because hardwoods are too difficult to cut and add tiny features to, and basswood is probably going to be your best option for most whittling projects.
You will likely begin by carving out the odd spoon at first, but if you persevere, you can end up being the creator of some very beautiful and intricate designs.
It’s truly amazing how many different shapes and designs can be created simply by cutting wood with a knife.
With the majority of whittling carvings you do not sand the knife lines, it’s far better to leave them revealed, the knife lines are a feature, not a fault.
Carving knives are intended for sweeping or whittling motions. They’re ideal for projects that require you to clean and shape the wood rather than carving intricate designs into it, but it’s not impossible to carve intricate designs into it.
In the case of spoon carving, a straight blade would be used to carve the spoon handle or the outside of the spoon cup, while a curved blade would be used to form the inside of the spoon.
Whittling has got to be the most affordable form of woodworking there is; most knife carvings require only a pocket knife, a piece of softwood, and a comfortable chair on your porch or in your shed.
What is Chip Carving?
If you’re new to woodworking, chip carving is another great place to start since it is quick, easy, and simple to master, and only requires a few tools.
It is a very decorative carving technique that involves using chisels or knives to remove small chips from a wood surface.
The first step in chip carving is to select a pattern and then draw that pattern onto the wood, and this is not a simple task.
The pattern needs to be exact so you should take your time making sure everything is correct, do not rush it.
A straight edge, compass, and pencil can be used to create your pattern.
Once you’ve got a pattern you like, simply grab your preferred softwood and a good quality set of chisels, and begin making small cuts in your piece until you’ve achieved the desired design. Chip carving can produce fascinating and beautiful designs, and it is frequently used to make decorations. Chip carving can also be used to create picture frames, brighten up boxes, wooden chests, and cutlery as well as some cabinetry designs.
Chip Carving Knives are distinguished from other wood carving knives by the fact that their blades protrude downward from the handle, providing extra control.
After being ‘plunged into the wood,’ chip carving knives are moved forwards. Chip carving knife blades must be thinner and sharper than other blades.
The way you hold a chip carving knife is critical; the shades formed, as well as the angles of the cuts, contribute significantly to the appeal of chip carving.
What is Relief Carving?
Relief carving is a type of wood carving in which figures are carved into a flat panel of wood, with only one side of the piece worked on. It necessitates the use of more sophisticated carving techniques, and the resulting 3D effect can be truly fascinating to look at. Relief carvings are classified as high relief or low relief based on the depth of the cut.
Relief carving’s three dimensional look makes it easy to portray people, places, animals, and activities. If you’re new to woodcarving, it’s preferable to practise a variety of various patterns before attempting relief carving due of its difficult, intricate techniques.
It can be used to make wooden sculptures, signs, and a variety of other organic designs. You could carve a relief into the face of a larger piece or object, or you could create a stand-alone product that you could proudly display in your living room.
U or V shaped cutting tools & a mallet is used to remove wood from large blocks.
What is Chainsaw Carving?
The most popular carving style in the world is chainsaw carving by far and there are some incredibly talented chainsaw carving artists. Most countries would hold chainsaw carving completions on a regular basis.
This might be the right carving option for you if you enjoy combining wood carving techniques with current technology chainsaws to create spectacular creations.
You can use a combination of different size chainsaws when doing a carving and I think chainsaw carving spawned the popularity of the battery powered mini chainsaws.
It’s a huge business and Stihl, Makita and Bosh all seem to now make a huge range that targets carvers.
You can carve just about anything with a chainsaw and if you look at the amazing works done by chainsaw artists such as Darrel Radcliffe, Steve Drenth, Griffon Ramsey, Gesse Green and Brandon Kroon, you’ll soon see what I mean.
Finishing Your Woodcarving Is Important.
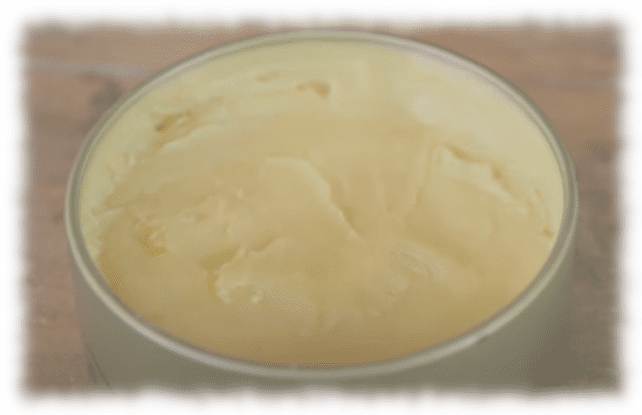
Finishing a wood carving involves using sandpaper and/or scrapers, cleaning the wood and then applying a finishing wax, oil, or lacquer.
Depending on how much smoothing is required, you will need to use a variety of sandpaper grains. The higher the grit number of the sandpaper, the smoother it will be. If the wood requires more aggressive sanding, use lower grit sandpaper, around 60-grit, especially if your piece is larger.
However, for projects that require less sanding or are smaller in size, use 100 grit or higher sandpaper for a softer, more delicate sanding finish.
Use higher grit/smoother sandpaper for areas with a lot of detail on your carving, such as facial features, as they can be easily damaged.
What Finishing Product will I use on my carving?
Applying a finishing product after you’ve finished carving is necessary to protect it and ensure its long-term durability. Wood is a porous material that can absorb moisture and oils. If you finish your wood projects properly, they will maintain their good looks for years and also look much better than an unfinished project.
So, when you’ve finished any sanding or scraping, it’s time to protect your carving.
Is Wax the best finishing product for a woodcarving?
Yes, I believe wax is the best option. Wax has always been and continues to be the most commonly used finishing product for all types of woodworking, including wood carvings. One of its main benefits is how easily it can be applied and reapplied to any wood surface, and it acts as a good barrier to prevent dust accumulation and provide water resistance.
Wax is also simple to remove and buff back to a gleaming finish. There are a few wax options but I don’t think you can beat Beeswax for finishing a woodcarving project because it provides such a lovely, rich finish.
It is a clear wax with no synthetic components that will not change the colour or appearance of the surface to which it is applied, making it a safe, natural, and effective way to beautify and protect your piece.
What is Linseed/Flaxseed Oil?
You could use Linseed/Flaxseed oil to protect your piece and it’s one of the most popular wood finishes in the world. Linseed/flaxseed oil is made by pressing the oil out of dried, ripened seeds of the flax plant.
The colour of the oil ranges from colourless to yellowish. Depending on how the well the pressing process goes, they need to follow up with solvent extraction.
Linseed oil penetrates deeply into the wood grain to protect it from dings and humidity changes. It produces a satin finish that brings out the colour and grain of the underlying wood, is easy to maintain, and is eco-friendly.
Polymerised linseed oil is the best option because it is pure, non-toxic, and dries quickly. Polymerised Linseed/Flaxseed Oil is created by heating raw linseed oil in the absence of oxygen to around 300°C over several days.
During this time, a polymerisation reaction occurs, increasing the viscosity of the oil and decreasing the drying time.
What is Tung Oil?
Tung oil, a plant-based oil, has been used to finish wood for many years. It strengthens and protects the wood by penetrating the grain and drying quickly. It is one of the worlds oldest and most widely used wood finishes.
Tung oil is pressed out of the seeds of the Tung tree from Eastern Asia.
The best option is probably polymerised Tung oil, which dries in 12 to 24 hours but pure Tung oil is fine too. They make Polymerised Tung oil by heated the oil is its purest form under high pressure to around 350°C.
It contains no driers or solvents and is used to make many of the oil finishes, paints, and varnishes used around the world.
Tung oil is completely natural, non-toxic, and environmentally friendly, and it does not yellow as quickly as linseed/flaxseed oil, some lacquers, or polyurethane varnishes.
Tung oil, on the other hand, is expensive and prone to water rings, stains, and scratches, so I believe it ultimately comes down to personal preference.
What Are Some Good Carving tips?
Woodcarving requires not only the use of appropriate tools, but also the mastery of proper technique and the selection of suitable wood for the project.
Once you’ve learned a good technique, it takes time and practise to master it.
Keep your tools as sharp as possible at all times. They must cut neatly, even when cutting against the grain.
Sharp carving tools are far safer to use than dull ones because a dull tool requires more effort, causing the tools to slip and slide and potentially cause you a nasty injury. So, first and foremost, learn how to correctly sharpen.
Use easy-to-carve woods, such as Basswood and learn about the properties of the various woods you might use. Learn about wood grain and how it can benefit or harm your projects success.
You should be able to draw a little if you want to learn to make your own designs and even if you aren’t that great at drawing, give it time, you’ll get there, practise makes perfect.
Of course, the designs are important, but even the best designs can be damaged by poor carving. Angle consistency can be achieved by working in the same physical position all of the time and holding the knife in the same method and spot.
Carving by hand is a skill as well as an art form. The reason for the wide range of final pieces is because each carver chooses their own method of carving.
Knowing what you want to achieve with your carvings will aid in the technique you choose to complete the project.
Carvings are subjected to a variety of damages and subsequent repairs.
The most vital aspect of a repair is also the most difficult: the fix must be permanent and undetectable. The best repair should be hidden from view.
Repairs that aren’t done well can detract from the appearance of a carving, so take as much care with them as you would with any other aspect of woodworker carving.
Gouges and chisels are designed to be pushed with your palm or pounded with a mallet to make cuts and remove wood. They’re ideal for relief and chip carving.
The two most prevalent forms of wood carving gouges and chisels are palm and mallet gouges and chisels.
Palm gouges are smaller gouges that are inserted into the cut with the palm of your hand. When cutting with these tools, you may get a high level of detail and control.
The most important things to keep in mind when using these tools are to keep them razor sharp and to carve woods with appropriate density and character.
Chisel gouges feature longer handles that are used with a mallet to create each cut.
When working on larger pieces or woods that are difficult to carve neatly, such as extraordinarily soft or excessively hard wood, this can be a substantially more effective instrument.
Some Information On Power Carving Tools.
Power carving tools have evolved a long way in recent years.
There are numerous options available, ranging from simple rotary carving tools such as the Dremel to angle grinder attachments.
Connecting a carving disc to an angle grinder and hand carving an entire bowl is now a straightforward operation.
A Dremel tool is one of the cheapest ways to get started with power carving.
Wood carving bit sets are relatively inexpensive, and the tool is simple enough for a novice to learn quickly.
While a Dremel isn’t the best tool for removing large amounts of wood, it can produce some incredible detail. Carving or shaping discs may be the best solution if you need to remove a lot of wood or shape large items like chairs.
Wood carving discs can quickly remove large amounts of wood, turning your shed into a sawdust factory in the process.
Shaping discs can also be attached to an angle grinder and give up some raw material removal power in exchange for greater control and shaping skills.
Wood Carving Safety Tips.
Wood carving, like any other type of woodworking, necessitates concentration and a few basic safety precautions.
Always cut away from your hand or torso in a controlled manner.
Maintain the sharpness of your tools because a dull instrument requires more force, which could cause it to slip and come into contact with your body.
Rotary tools are inherently dangerous because they are difficult to control and produce a large amount of chips and dust.
Wear proper eye, respiratory, and ear protection at all times.
Tips For When Sanding Your Carving Project.
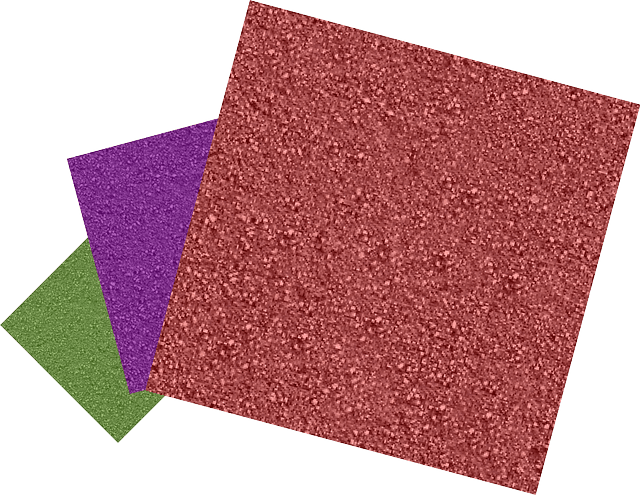
Sanding is one of the simplest techniques for finishing wood carvings, but it can be challenging at times. If done correctly, it can produce a smooth surface that improves the quality of the wood used.
If you finish incorrectly, you will end up with a variety of surfaces and textures. Sanding will be necessary for any wood carving project, so keep a variety of sanding products on hand.
Sanding can help you avoid problems like cracks, dents, and debris while also smoothing the surface. Before using any sanding tools, make sure the surface of your carving is as smooth as possible.
Uneven surfaces, sloppy corners, and gouge cuts all need to be fixed. The sanding tool you use has the greatest influence on your sanding success.
Sandpaper, an oscillating brush, or a contoured sanding grip can be used to go around curved edges and within coves on intricate carvings.
For larger, less delicate jobs, use a rotary tool or an orbital sander. Select a sanding tool based on three factors: the hardness of the wood, the complexity of the carving, and whether you intend to remove the finish later.
Sand in the direction of the grain at all times. Going against the grain can result in difficult-to-remove scratches.
Pressing too hard on a carving with a power sanding tool can change its contour, so sandpaper is a better option if your power tool can’t reach tight nooks or crevices.
Sandpaper has been around for centuries and is a very useful tool. The first examples of abrasive-coated material were discovered in China in the 13th century.
Unlike modern sandpaper, early types of sandpaper used actual sand.
Sand and smashed up seashells were glued to parchment paper to make a simple but effective abrasive.
Nowadays, sandpaper and abrasives are far more sophisticated. Sand has been supplanted by more durable natural and man-made materials, as well as tiny grains known as grit sizes.
Sandpapers are currently manufactured from a variety of materials.
Each of these materials has distinct properties that enable it to achieve specific results on various surfaces.
When working with wood, garnet is a popular choice for hand sanding to remove light scratches and prepare surfaces for finishing. Garnet sandpaper wears quickly, which may be advantageous because it improves in quality as it ages.
Emery paper, also known as emery cloth due to its cloth backing, is a coarser abrasive used for sanding and polishing metal surfaces.
Aluminium oxide sandpaper is suitable for a variety of materials such as wood, metal, plastic, and drywall. Aluminium oxide coatings have the added benefit of exposing new, sharp edges as they wear away, making them a more durable abrasive.
Silicon carbide abrasives are popular for wet sanding because they are frequently made with a waterproof backing. The materials in this sandpaper can remove material faster than aluminium oxide, but they are not as durable.
Zirconium oxide, like garnet and aluminium oxide, contains particles that degrade to maintain a sharp surface.
Aluminium oxide is more durable than zirconia but not as durable as ceramic. This abrasive is commonly used on wood, fibreglass, and metal surfaces.
Because ceramic abrasives are extremely hard and durable, they are ideal for power sanding with ceramic belts or discs. Ceramic abrasives can outlast comparable grade sandpaper by up to six times.
Sifted materials are used to create a uniform grit size across the surface of your sandpaper. Only specific sized particles of the materials will pass through the filters on this machine at each step.
The grit size is determined by the number of particles that can pass through a 1 square inch filter. The greater the size of a particle, the fewer particles it can pass through at the same time.
As a result, if the grit size of the sandpaper is 80, this means that 80 particles will pass through the filter.
Despite the fact that the particles are much smaller, a grit size of 1200 allows significantly more particles to pass through. Higher grit numbers are required for smoothing wood and painted surfaces between applications.
Grits with a lower number are typically used for vigorous sanding, stripping, or cutting hard surfaces. Start with a coarser grit and work your way down to finer and finer grits if you want a particularly smooth surface.
Many sculptures must have multiple finishing coatings applied before they can be completed. After putting all the time and effort to complete things perfectly, it only makes sense to end your task right.
Finishing and coating the carving properly will draw attention to the work you’ve put in. As I mentioned earlier, I think bees wax is the best finishing product to use.
Last but not least and it’s not my preference but you can also purchase stains if you’re wondering how to finish wood carvings with a subtle change in colour.
Before applying your chosen stain, make sure to test it out on some scraps from your project. Apply several coats to achieve the colour you want. Just ensure that each layer dries down first before you apply the next one.

