Finishing Techniques For Wooden Products.
Woodworking finishing techniques are an essential part of the
craft and serve as the final step in the creation of your wooden product.
After the primary construction or shaping is completed, these
methods and processes are used to protect and enhance the appearance of wooden
surfaces.
Finishing techniques are extremely important in woodworking
because they influence the aesthetic appeal and longevity of the finished
product.
Finishing techniques include a variety of methods such as
staining, sealing, varnishing, and waxing.
Each technique has its own set of advantages, and the method
chosen is often determined by the desired outcome and the type of wood used.
For instance, staining can accentuate the natural grain of the
wood, while sealing can provide a protective barrier against moisture and
environmental factors.
The impact of these techniques extends beyond mere appearance.
Properly applied finishes can significantly enhance the feel and durability of
wooden creations.
For example, a well-applied varnish can create a smooth,
glass-like surface that is resistant to scratches and wear. On the other hand,
oils and waxes can provide a more natural feel while still offering a degree of
protection.
In essence, woodworking finishing techniques are about
balancing aesthetics with functionality.
They allow woodworkers to highlight the inherent beauty of the
wood while ensuring that the finished piece is resilient and long-lasting.
Primary Categories of Wood Finishes.
Wood finishes play a crucial role in both enhancing the
aesthetic appeal of wooden creations and protecting them from damage.
Broadly, wood finishes are categorized into surface finishes
and penetrating finishes, each offering unique benefits and characteristics.
Surface finishes form a protective layer on the wood’s
surface, creating a barrier against moisture, scratches, and other
environmental factors.
Among the popular surface finishes are varnish, shellac,
lacquer, and polyurethane:
Varnish is renowned for its durability and resistance to heat,
water, and wear. It is often used on furniture and flooring where a robust
finish is essential. Varnish can be found in various sheens, from satin to
gloss, allowing for customizable aesthetics.
Shellac is a natural resin that provides a warm, amber hue to
wood surfaces. It is quick-drying and can be layered to achieve a high-gloss
finish.
However, shellac is less durable compared to other finishes
and is best suited for interior woodwork that will not be exposed to heavy wear
or moisture.
Lacquer is prized for its fast-drying properties and ability
to produce an exceptionally smooth, hard finish. It is commonly used in
cabinetry and musical instruments. Lacquer is available in various types,
including nitrocellulose and acrylic, each with distinct advantages.
Polyurethane is a synthetic finish that provides excellent
durability and resistance to chemicals, heat, and water.
It is available in both oil-based and water-based
formulations, with the latter being more environmentally friendly and quicker
to dry.
Polyurethane is ideal for surfaces that need to withstand
heavy use, such as tables and countertops.
Penetrating finishes, on the other hand, seep into the wood,
enhancing its natural beauty while offering a more subtle layer of protection.
The most common penetrating finishes are oil and wax:
Oil finishes, such as linseed oil and tung oil, penetrate deep
into the wood fibers, highlighting the grain and providing a rich, natural
look.
These finishes are easy to apply and maintain, making them a
popular choice for wooden furniture and decorative items.
Wax finishes offer a soft sheen and a tactile feel. They are
often used in conjunction with other finishes to add an extra layer of
protection and enhance the wood’s appearance.
Wax finishes are ideal for pieces that require a delicate
touch, such as antique furniture and fine woodwork.
Understanding these primary categories of wood finishes allows
you to select the appropriate method for enhancing and protecting your wooden
creations, ensuring their longevity and beauty.
Oil-Based vs. Water-Based Finishes.
When it comes to woodworking finishes, the choice between
oil-based and water-based options is pivotal.
These finishes significantly impact the final appearance,
durability, and environmental footprint of wooden creations.
Understanding their differences will help in making an
informed decision tailored to specific project needs.
Oil-based finishes are renowned for their deep, rich luster,
which enhances the natural grain of the wood.
Composed primarily of mineral spirits, linseed oil, or similar
solvents, these finishes penetrate deeply, creating a robust protective layer.
However, the application process can be labor-intensive, often
requiring multiple coats and extended drying times.
Typically, oil-based finishes take longer to cure, sometimes
up to several days, depending on environmental conditions.
In contrast, water-based finishes are formulated with water as
the primary solvent, making them easier to apply and quick to dry.
They tend to form a hard, clear film on the wood’s surface
rather than penetrating deeply.
This characteristic makes water-based finishes ideal for
projects where a more natural, less glossy appearance is desired.
The drying time is often within a few hours and allows for
quicker project completion and reduced downtime between coats.
Durability is another critical factor. Oil-based finishes
generally offer superior wear resistance and are better suited for high-traffic
areas or outdoor furniture.
They are less prone to water damage and can withstand
significant wear and tear. Conversely, while water-based finishes are durable,
they may not offer the same level of protection as their oil-based
counterparts, making them more suitable for indoor projects with less exposure
to harsh conditions.
Environmental impact is a growing concern in woodworking.
Oil-based finishes typically contain higher levels of volatile organic
compounds (VOCs), contributing to air pollution and health risks.
Water-based finishes, however, are more eco-friendly,
releasing fewer VOCs and having a lower environmental footprint. This makes
them a preferable option for those prioritizing sustainability.
Ultimately, the choice between oil-based and water-based
finishes depends on the specific requirements of the woodworking project.
Each type offers distinct advantages and considerations, from
the richness of the finish to application ease, durability, and environmental
impact.
The French Polishing Technique.
The French polishing technique is renowned for producing a
lustrous, high-gloss finish that accentuates the natural beauty of wooden
surfaces.
This traditional method, originating in the early 19th
century, is particularly favored for its ability to bring out the depth and
richness of wood grain, making it a popular choice for fine furniture and
musical instruments.
The process of French polishing involves the application of
numerous thin layers of shellac, a natural resin, dissolved in alcohol.
The shellac is applied using a pad made from a soft cloth,
often referred to as a ‘fad’ or ‘rubber’.
The pad is dampened with the shellac solution and then worked
in a circular motion over the wood surface.
This technique requires significant skill and patience, as
achieving the desired finish involves multiple sessions, sometimes extending
over several days or weeks.
Materials essential for French polishing include high-quality
shellac flakes, denatured alcohol, pumice powder, and a soft cloth for the pad.
The shellac flakes are dissolved in the alcohol to create the
polishing solution, while the pumice powder is often used to fill the wood
grain, providing a smooth base for the polish.
The process is intricate, demanding precision and care to
avoid streaks and ensure an even application.
One of the reasons French polishing is considered challenging
is the need for consistent, even pressure and smooth, fluid movements during
application.
Additionally, environmental factors such as humidity and
temperature can significantly impact the drying and curing process, requiring
the polisher to have a keen understanding of these variables.
Historically, French polishing gained prominence during the
Victorian era, becoming the preferred method for finishing high-quality
furniture.
The technique’s ability to produce a mirror-like sheen without
the use of modern synthetic coatings contributed to its enduring appeal.
The finish produced by French polishing is not only visually
stunning but also offers a tactile experience, with the surface feeling warm
and smooth to the touch.
Despite being labor-intensive, the results are highly prized,
making French polishing a revered technique among woodworking enthusiasts and
professionals alike.
If you would like to learn more about The French Polishing Technique,
you can read the article I dedicated to this subject.
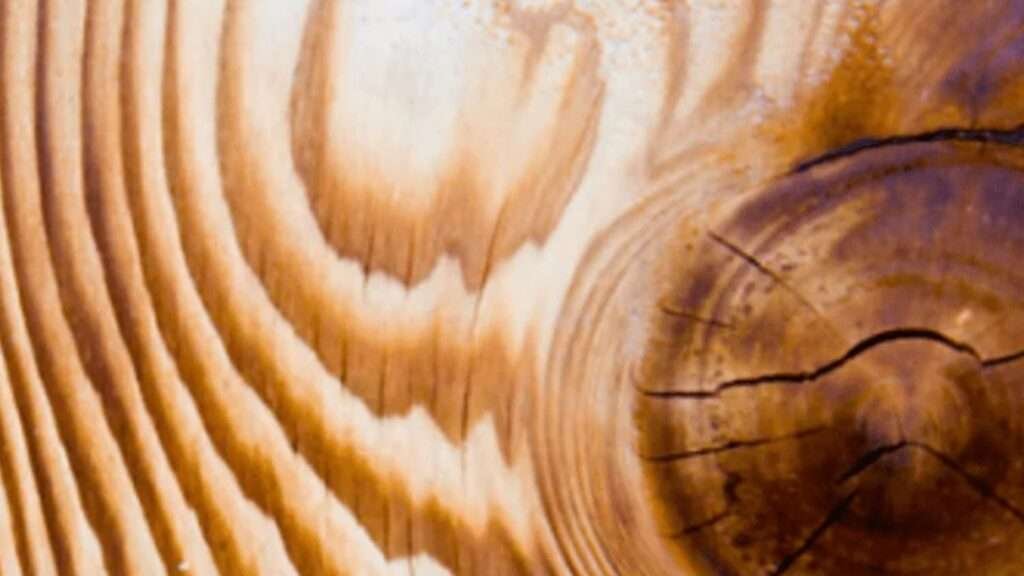
Wood Grain and Finishing Choices.
The Natural
Beauty Of Wood Grain plays a pivotal role in determining the appropriate
finishing technique for any woodworking project.
The grain pattern, which is the natural alignment of the wood
fibers, can either be highlighted or obscured depending on the chosen finish.
Understanding the interaction between wood grain and various
finishes is essential for achieving the desired aesthetic and functional
outcomes in your wooden creations.
Clear finishes, such as varnish, shellac, and polyurethane,
are commonly used to enhance the natural beauty of the wood grain.
These finishes provide a transparent layer that allows the
intricate patterns and textures of the grain to remain visible.
For woods with striking grain patterns, such as oak, walnut,
and cherry, a clear finish can accentuate their natural allure, making the wood
appear more vibrant and lively.
In contrast, opaque finishes, like paint or solid stains, can
obscure the grain, offering a uniform appearance that may be preferred for less
visually interesting wood types or when aiming for a specific color scheme.
The characteristics of different wood types also influence the
choice of finishing technique.
Hardwoods, such as maple and mahogany, often have dense and
tight grain structures that respond well to both clear and colored finishes.
Softwoods, like pine and cedar, have more open grain patterns
and may require sealing or filling before applying a finish to achieve a smooth
and even surface.
Moreover, some woods, like teak and rosewood, contain natural
oils that can affect the adhesion and drying time of certain finishes,
necessitating the use of specialized products or techniques.
When selecting a finishing technique, it is crucial to
consider not only the aesthetic impact but also the wood’s functional
requirements.
For instance, a high-gloss finish may be ideal for decorative
pieces, while a more durable, water-resistant finish might be necessary for
outdoor furniture or kitchen countertops.
By thoughtfully choosing the right finish to complement the
wood grain and its inherent properties, you can enhance both the visual appeal
and longevity of your woodworking projects.
Pros and Cons of Polyurethane Finishes.
Polyurethane finishes are a popular choice in woodworking,
offering a range of benefits that make them suitable for various projects.
One of the primary advantages of polyurethane is its
exceptional durability. This finish creates a hard, protective layer on the
surface of the wood, making it resistant to scratches, water damage, and
general wear and tear.
As a result, polyurethane is often the finish of choice for
high-traffic items such as floors, tabletops, and cabinetry.
Another notable benefit is the ease of application.
Polyurethane can be applied with a brush, roller, or spray, making it
accessible to both novice and experienced woodworkers.
Additionally, it comes in both oil-based and water-based
formulations, catering to different preferences and project requirements.
Water-based polyurethane dries quicker and has a lower odor,
while oil-based polyurethane provides a richer, warmer tone to the wood.
Despite these advantages, polyurethane finishes are not
without their drawbacks. One of the most significant disadvantages is the
potential for yellowing over time, particularly with oil-based versions.
This can alter the appearance of lighter woods and affect the
overall aesthetic of the finished piece.
Furthermore, repairing a polyurethane finish can be
challenging. Unlike some other finishes that allow for easy touch-ups,
polyurethane often requires sanding down the entire surface and reapplying the
finish to achieve a seamless repair.
While polyurethane finishes offer remarkable durability and
ease of application, they come with potential downsides such as yellowing and
difficulty in repair.
These factors should be carefully considered when selecting a
finish for your woodworking project, ensuring that it meets the specific needs
and aesthetic goals of your creation.
Achieving a Distressed or Weathered Look.
Creating a distressed or weathered look on wood can add a
unique and rustic charm to your woodworking projects.
This aesthetic is highly sought after for its vintage appeal
and can be achieved through various techniques.
Here, we will explore methods such as chemical aging, physical
distressing, and the application of specific finishes to transform your wooden
creations.
Chemical aging involves the use of substances that react with
the wood to produce an aged appearance.
Common agents include vinegar, tea, and steel wool. For
instance, applying a solution of vinegar and steel wool to the wood can create
a greyed, weathered look.
This reaction mimics the natural aging process, providing an
authentic patina that enhances the wood’s character.
Physical distressing, on the other hand, involves manually
altering the wood’s surface to simulate years of wear and tear.
Techniques such as sanding, scraping, and denting are commonly
employed. By selectively removing areas of the wood’s top layer or using tools
to create nicks and gouges, you can give the piece a well-worn, antique
appearance.
This method allows for a high degree of creativity and
customization, enabling you to achieve a specific distressed look tailored to
your project’s needs.
Applying specific finishes is another effective way to achieve
a weathered look. Stains, waxes, and paints can be used to enhance the
distressed effect.
For example, applying a dark stain followed by a lighter
topcoat can create a layered, timeworn appearance.
Additionally, techniques such as dry brushing and whitewashing
can impart a faded, sun-bleached look, perfect for achieving a coastal or
farmhouse style.
Combining these techniques can yield impressive results,
giving your woodworking projects a unique and timeless appeal.
Whether you prefer the subtleties of chemical aging or the
bold impact of physical distressing, each method offers a distinct way to
enhance and protect your wooden creations, ensuring they remain beautiful and
durable for years to come.
Food-Safe Wood Finishes.
When crafting wooden items destined for contact with food,
such as cutting boards, bowls, and utensils, the application of food-safe
finishes is crucial.
These finishes not only enhance the aesthetic appeal of your
creations but also ensure that they remain safe for culinary use.
Understanding the types of food-safe finishes available and
their proper application methods can significantly extend the life and
functionality of your wooden pieces.
One popular option is mineral oil; it’s a clear and odorless
oil that penetrates deeply into the wood. It is often favored for its
simplicity and effectiveness in protecting against moisture.
Mineral oil is non-toxic and easy to apply, requiring nothing
more than a clean cloth to rub it into the surface of the wood. Regular reapplication
is necessary to maintain its protective qualities.
Another excellent choice is beeswax, either alone or mixed
with mineral oil. Beeswax provides a natural, durable finish that enhances the
wood’s grain and offers a gentle sheen.
To apply, melt the beeswax and mix it with warm mineral oil.
Once cooled, this mixture can be rubbed onto the wood and buffed to a smooth
finish.
Tung oil, derived from the seeds of the tung tree, is another
robust food-safe option. It cures to a hard, protective layer that resists
water and wear.
Pure tung oil is recommended for food-contact surfaces, as it
does not contain the potentially harmful additives found in some commercial
blends. Applying tung oil involves multiple coats, each thoroughly dried before
the next application.
For those seeking a more modern approach, there are also
commercially available products explicitly labeled as food-safe.
These finishes are often tested and certified to meet food
safety standards. It’s essential to follow the manufacturer’s instructions
carefully to ensure optimal results and safety.
Using the appropriate food-safe finish not only preserves the
beauty and integrity of your wooden items but also ensures they remain safe for
everyday use in the kitchen.
By selecting the right product and applying it correctly, you
can create functional, long-lasting, and safe handcrafted pieces.
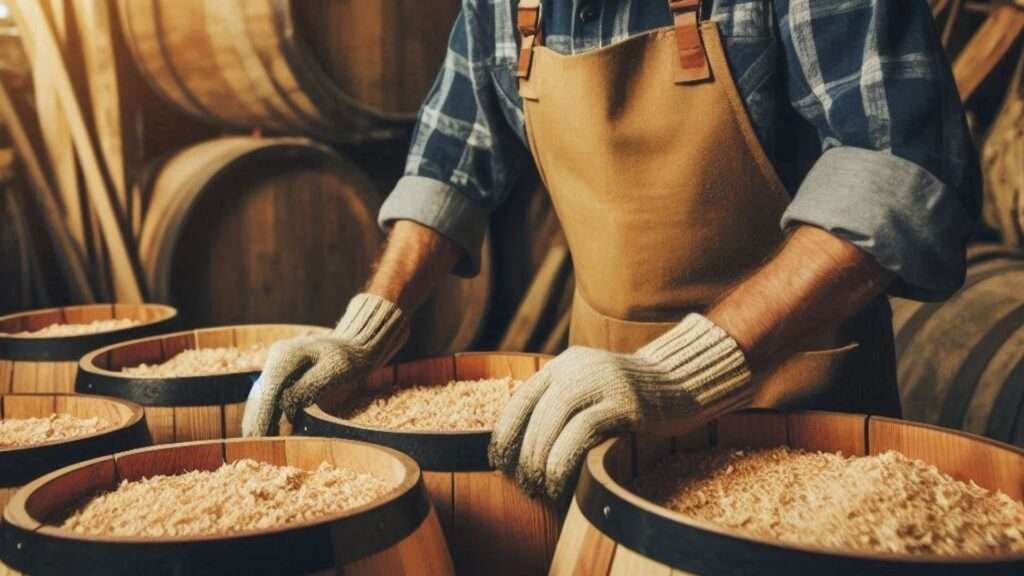
Fuming Oak and Its Effects.
Fuming oak is a traditional woodworking technique that
significantly alters the appearance of oak wood, enhancing its aesthetic
appeal.
The process involves exposing the wood to ammonia fumes, which
react with the tannins present in the oak.
This chemical reaction results in a dramatic color
transformation, often deepening the wood to rich, dark hues that range from
warm browns to almost black, depending on the concentration of tannins in the
wood and the duration of exposure.
To perform fuming, the primary materials required are ammonia,
preferably of a concentrated form, and a sealed chamber where the wood can be
exposed to the fumes safely.
The wood pieces are placed inside the chamber, and containers
of ammonia are positioned to ensure that the fumes can circulate freely around
the wood. Safety is paramount in this process due to the hazardous nature of
ammonia.
Protective gear, including gloves, goggles, and a respirator,
is essential to prevent inhalation and skin contact.
Additionally, the fuming chamber should be well-ventilated to
avoid the buildup of excessive fumes, which can be harmful.
During the fuming process, the ammonia gas penetrates the wood
fibers, causing a chemical change in the tannins.
This reaction is responsible for the distinctive color changes
observed in the oak. The depth and uniformity of the color can be controlled by
adjusting the exposure time and the concentration of ammonia used. Typically, longer exposure times result in
darker and more pronounced color changes.
The aesthetic effects of fuming oak are highly valued in
woodworking. The wood gains a unique, aged appearance that enhances the natural
grain patterns, offering a sophisticated and timeless look.
This technique is particularly popular for creating furniture
and decorative pieces that require a classic, yet striking, visual appeal.
By understanding and implementing the fuming process,
woodworkers can achieve remarkable results, adding both beauty and value to
their creations.
Shellac vs. Lacquer Finishes.
When it comes to woodworking finishing techniques, shellac and
lacquer are two popular choices, each with its own set of unique properties and
benefits.
Understanding these characteristics can help you make an
informed decision about which finish is best suited for your specific project.
Shellac is a natural resin secreted by the lac bug. It is
dissolved in alcohol to create a liquid finish that is easy to apply with a
brush or a cloth.
One of the primary advantages of shellac is its quick drying
time. Typically, shellac dries to the touch within 30 minutes and can be
recoated in about an hour. This makes it an excellent choice for projects that
require multiple coats in a short period.
Shellac provides a warm, amber tone that enhances the natural
beauty of wood. It is highly regarded for its ability to bring out the grain
and add depth to the overall appearance.
However, shellac is not as durable as some other finishes. It
is susceptible to water damage, alcohol, and heat, making it less suitable for
items that will experience heavy use or exposure to harsh conditions.
Shellac is best suited for decorative pieces, furniture, and
antiques that require a classic, refined look.
Lacquer, on the other hand, is a synthetic finish that offers
exceptional durability and protection.
It is typically applied using a spray gun, which allows for a
smooth, even coat. Lacquer dries quickly as well, often within 15 minutes, and
can be sanded and recoated in about an hour.
This rapid drying time makes it ideal for high-volume
production and projects that require a durable finish in a short timeframe.
One of the standout features of lacquer is its ability to form
a hard, protective shell that resists water, chemicals, and physical wear.
This makes it an excellent choice for items that will endure
frequent handling or exposure to the elements, such as kitchen cabinets,
musical instruments, and outdoor furniture. Lacquer finishes can also be polished
to a high gloss, adding a sleek, modern look to any project.
In summary, the choice between shellac and lacquer depends on
the specific needs of your woodworking project.
Shellac offers a beautiful, traditional finish but lacks the
durability of lacquer, which provides a robust, long-lasting protective layer.
Consider the desired aesthetic and the functional demands of
your piece when selecting the appropriate finish.
Applying a Hand-Rubbed Oil Finish.
Hand-rubbed oil finishes are revered for their ability to
enhance the natural beauty of wood while providing a degree of protection.
This finishing technique involves the use of various oils,
each imparting unique characteristics to the wood.
Common choices include linseed oil, tung oil, and Danish oil,
each known for their ease of application and deep penetration into the wood
fibers.
Before beginning the application process, it is crucial to
prepare the wood surface meticulously. Start by sanding the wood progressively
with finer grits of sandpaper, finishing with at least 220-grit.
This ensures a smooth surface, which is essential for an even
oil application. After sanding, remove all dust particles using a vacuum and a
tack cloth to ensure no residues interfere with the oil finish.
The application of the oil itself is a straightforward yet
precise process. Begin by saturating a clean, lint-free cloth with the chosen
oil.
Apply the oil generously to the wood surface, working in the
direction of the grain to ensure thorough penetration. Allow the oil to soak in
for about 15 to 30 minutes. During this period, the wood will absorb the oil,
enhancing its grain and overall appearance.
After the initial soaking period, wipe off any excess oil with
a dry, clean cloth. This step is critical to avoid a sticky or uneven finish.
For optimal results, multiple coats are recommended.
Typically, apply a second coat after the first has cured for 24 hours.
Repeat the process by applying, soaking and wiping until the
desired finish is achieved, usually after three to five coats.
To achieve a professional-grade hand-rubbed oil finish,
patience and attention to detail are paramount.
Each coat should be allowed to cure fully before applying the
next, and light sanding with fine-grit sandpaper between coats can further
enhance the smoothness and luster of the final finish.
Ultimately, this method not only beautifies the wood but also
provides a durable and timeless protective layer.
Achieving a High-Gloss Finish.
Achieving a high-gloss finish on wood is a meticulous process
that requires careful preparation, the right selection of products, and precise
application techniques.
The goal is to create a mirror-like sheen that enhances the
natural beauty of the wood while providing a durable surface.
The first step in this process is to prepare the wood surface
properly. This involves thorough sanding to ensure the surface is smooth and
free of imperfections.
Start with a coarse-grit sandpaper and gradually move to finer
grits, finishing with a 220-grit or higher to achieve a smooth base.
Once the sanding is complete, the next critical step is to
choose the appropriate finishing products. High-gloss finishes can be achieved
using various products such as lacquer, polyurethane, shellac, or varnish.
Each of these products has unique properties, so it’s
essential to select one that suits the specific characteristics of the wood and
the desired outcome.
For instance, polyurethane is known for its durability and
resistance to scratches, making it a popular choice for high-traffic areas,
while lacquer offers a smoother, more polished appearance.
Application methods are equally important in achieving a
high-gloss finish. Applying multiple thin coats rather than a single thick coat
helps to avoid runs and drips and ensures an even application.
After each coat, lightly sand the surface with a fine-grit
sandpaper (320-grit or higher) to remove any imperfections and promote adhesion
of subsequent layers.
This process, known as “sanding between coats,” is
crucial for building up a smooth, glossy finish. It reminds me of a saying my Uncle who was a
panel beater/spray painter used to say, “You sand to a finish, you don’t paint
to a finish”. Sanding between coats is
definitely important.
The final step in achieving a high-gloss finish is polishing.
Once the final coat has dried completely, use a polishing compound and a soft
cloth to buff the surface to a high shine.
For an even more refined sheen, consider using a mechanical
buffer. Polishing not only enhances the gloss but also removes any remaining
surface imperfections, resulting in a flawless finish.
Creating and Applying Milk Paint Finishes.
Milk paint, a traditional finish with a history dating back
thousands of years, is cherished for its unique aesthetic qualities and
environmental friendliness.
It is made from simple, natural ingredients: milk protein
(casein), lime, and natural pigments.
This combination results in a biodegradable, non-toxic paint
that is safe for both the environment and the user, making it an excellent
choice for those looking to create sustainable and beautiful wooden pieces.
The historical significance of milk paint is notable. It has
been used since ancient times by civilizations around the world, from the
Egyptians to early American settlers.
Its enduring popularity is a testament to its durability and
the distinctive matte finish it provides, which can vary from a solid, opaque
color to a more translucent, layered look, depending on application techniques.
Creating milk paint is a straightforward process. Begin by
mixing milk protein with water to create a smooth consistency.
Next, add lime to the mixture, which acts as a binder and
helps the paint adhere to the wood surface. Finally, incorporate natural
pigments to achieve the desired color. The resulting mixture should be used
within a few days, as it has a relatively short shelf life.
Applying milk paint involves several steps to ensure an even
and long-lasting finish. First, prepare the wooden surface by sanding it smooth
and cleaning off any dust or debris.
Apply the milk paint using a brush or sponge, working in thin,
even coats. Allow each coat to dry thoroughly before applying the next,
typically 2-4 hours. Depending on the desired look, you may apply multiple
layers, lightly sanding between coats to achieve a smoother finish.
One of the significant benefits of milk paint is its
versatility. It can be used to create a variety of finishes, from rustic and
distressed to sleek and modern.
Additionally, it is known for its excellent adhesion
properties, making it suitable for both raw and previously finished wood
surfaces.
The result is a durable, breathable finish that enhances the
natural beauty of the wood while providing protection from environmental
elements.
Spray Finishing: Challenges and Benefits.
Spray finishing is a popular technique in woodworking for
applying finishes to wooden projects. This method offers numerous advantages,
but it also comes with its own set of challenges that woodworkers must
navigate. Understanding both the benefits and drawbacks of spray finishing can
help you decide if this technique is suitable for your projects.
One of the primary benefits of spray finishing is the ability
to achieve a smooth, even coat quickly and efficiently.
This method is particularly advantageous for large or
intricate pieces where traditional brush or wipe-on methods might be
labor-intensive or inadequate.
The resulting finish is often superior in appearance,
providing a professional-grade look with minimal effort.
However, spray finishing requires specific equipment,
including a spray gun, air compressor, and appropriate safety gear.
The initial investment in this equipment can be significant,
and proper maintenance is essential to ensure its longevity and performance.
Additionally, achieving the perfect finish with a spray gun
involves a learning curve. Mastery of the technique requires understanding the
correct air pressure, spray pattern, and distance from the surface. These
factors can significantly influence the quality of the finish.
Common pitfalls in spray finishing include overspray, runs,
and sags. Overspray occurs when the finish lands on unintended areas, which can
be mitigated by using masking tape or other protective measures.
Runs and sags happen when too much finish is applied too
quickly, leading to uneven surfaces. These issues can be avoided by practicing
on scrap wood and adjusting the spray technique accordingly.
Certain types of projects benefit most from spray finishing,
such as large furniture pieces, cabinetry, and complex shapes with numerous
nooks and crannies. The ability to cover large surfaces quickly and evenly
makes spray finishing an ideal choice for these applications.
Additionally, spray finishing is well-suited for applying
lacquer, polyurethane, and other fast-drying finishes that can be challenging
to apply with a brush.
In summary, while spray finishing offers numerous advantages,
including efficiency and superior finish quality, it also presents challenges
that require practice and the right equipment.
By understanding these factors, you can make an informed
decision about whether spray finishing is the best technique for your
woodworking projects.
Preparing Wood for Finishing.
Properly preparing wood surfaces is a critical step in
achieving a high-quality finish. The process begins with meticulous sanding,
which smoothes the wood and removes any imperfections.
Start with a coarse grit sandpaper, such as 80-grit, to
eliminate rough patches or uneven surfaces. Gradually progress to finer grits,
like 120-grit, 180-grit, and finally 220-grit, to achieve a smooth, even
texture.
Sanding in the direction of the wood grain is essential to
avoid scratches and maintain the natural grain pattern.
Once the sanding process is complete, it is crucial to
thoroughly clean the wood to remove all dust and debris.
Use a vacuum or a tack cloth to lift and remove fine particles
that could interfere with the finish. Any residual dust can lead to a rough
texture or blemishes in the final coat, so this step should not be overlooked.
In some cases, additional treatments may be necessary before
applying the finish. For example, if the wood has visible knots or resin
pockets, these should be sealed with a shellac-based primer to prevent them
from bleeding through the finish.
Similarly, if the wood is prone to staining unevenly, a
pre-stain wood conditioner can be applied to promote uniform absorption of the
stain.
Moisture is another factor to consider when preparing wood.
Wood that is too wet or too dry can affect the adhesion and appearance of the
finish.
Use a moisture meter to ensure the wood’s moisture content is
within the recommended range for the type of finish you plan to use. Generally,
a moisture content of 6-8% is ideal for most finishes.
By carefully sanding, cleaning, and treating the wood, you set
the foundation for a successful finishing process. Each of these steps plays a
vital role in enhancing the wood’s natural beauty and ensuring the durability
of the final finish.
Eco-Friendly and Natural Wood Finishes.
In recent years, the demand for eco-friendly and natural wood
finishes has grown significantly.
These finishes are not only beneficial to the environment but
also safe for users, making them an excellent choice for those looking to
protect and enhance their wooden creations without compromising health or
sustainability.
Several products and techniques available today are designed
to meet these criteria, ensuring that woodworking enthusiasts and professionals
alike can achieve beautiful and durable results.
One popular option is natural oil finishes, such as tung oil,
linseed oil, and walnut oil. These oils penetrate deeply into the wood fibers,
providing a rich, natural appearance while enhancing the wood’s inherent
beauty.
Tung oil, in particular, is highly regarded for its
water-resistant properties and durability. Linseed oil, derived from flax
seeds, is another excellent choice, known for its ability to bring out the
wood’s natural grain and color.
Walnut oil, a non-toxic option, is ideal for surfaces that
come into contact with food, such as cutting boards and kitchen utensils.
Beeswax is another sustainable and natural finish that has
been used for centuries. When applied, beeswax forms a protective barrier on
the wood surface, offering a gentle sheen and a smooth, tactile feel.
It is often combined with oils to enhance its protective
qualities and provide additional depth and warmth to the wood.
Shellac, a resin secreted by the lac bug, is an eco-friendly
wood finish that offers a glossy, hard-wearing surface.
When dissolved in alcohol, shellac can be easily applied to
wood, drying quickly to form a protective layer. It is also food-safe and can
be used on items like children’s toys and furniture.
For those seeking a more modern approach, water-based finishes
are an excellent choice. These finishes emit fewer VOCs (volatile organic
compounds) compared to traditional solvent-based options, making them safer for
both users and the environment.
They provide a clear, durable coating that enhances the wood’s
natural beauty without yellowing over time.
Overall, eco-friendly and natural wood finishes offer a range
of benefits, from aesthetic enhancement to environmental sustainability.
By choosing these options, woodworkers can create stunning,
long-lasting pieces while contributing to a healthier planet.
10 Important ‘Don’ts’ for Applying Finishes.
When it comes to applying finishes in woodworking, there are
several crucial ‘don’ts’ that can make or break the final appearance and
durability of your project.
By understanding and avoiding these common pitfalls,
woodworkers can achieve a more professional and lasting finish.
1. Don’t Skip Surface Preparation:
Proper surface preparation is key to a smooth finish. Skipping sanding or
neglecting to remove dust and debris can result in an uneven or rough texture.
2. Don’t Apply Finish in Dusty Environments:
Dust particles can settle on wet finish, creating imperfections. Always work in
a clean, controlled environment to ensure the best results.
3. Don’t Ignore Manufacturer’s Instructions:
Each finishing product has specific instructions regarding application
techniques, drying times, and number of coats. Ignoring these guidelines can
lead to poor adhesion or an uneven finish.
4. Don’t Over-apply Finish: Applying
too much finish at once can cause runs, drips, or a sticky surface. It’s better
to use multiple thin coats, allowing each to dry thoroughly before applying the
next.
5. Don’t Rush Drying Times: Patience
is essential in woodworking finishing. Rushing the drying process can result in
a tacky or soft finish that lacks durability.
6. Don’t Forget to Stir Finishes:
Many finishes contain solids that settle over time. Always stir the product
thoroughly before application to ensure an even consistency and color.
7. Don’t Mix Different Brands or Types of
Finishes: Combining different finishes can lead to chemical
incompatibility, resulting in peeling or bubbling. Stick to one brand and type
per project.
8. Don’t Use Inferior Brushes or Applicators:
Quality tools make a significant difference. Cheap brushes can shed bristles,
and low-quality applicators may leave streaks or bubbles.
9. Don’t Apply Finish in Extreme Temperatures or
Humidity: Environmental conditions affect the drying and curing
process. Avoid applying finishes in very hot, cold, or humid conditions to
prevent issues like blushing or cracking.
10. Don’t Neglect Safety Precautions:
Many finishing products contain harmful chemicals. Always use proper
ventilation, wear protective gear, and follow safety guidelines to protect your
health.
By adhering to these ‘don’ts,’ woodworkers can avoid common
finishing errors and ensure that their wooden creations are both beautiful and
long-lasting.
In Conclusion.
Below are the 5 main takeaways for new woodworkers regarding
wooden product finishing techniques:
1.
Preparation is the key: The quality of your finish largely depends on
how well you prepare the wood surface.
a.
Always sand thoroughly, progressing through finer
grits, and clean the surface meticulously before applying any finish.
b.
Proper preparation ensures better adhesion and a
smoother final result.
2.
Understanding wood properties: Different wood species absorb finishes
differently. Learn about the characteristics of the wood you’re working with,
including its grain pattern, porosity, and natural color.
a.
This knowledge will help you choose appropriate
finishes and application techniques for the best results.
3.
Choose the right finish for the job: Consider the purpose of your piece when
selecting a finish. For example, a tabletop needs a more durable finish than a
decorative wall hanging.
a.
Factors to consider include water resistance, UV
protection, ease of application, drying time, and the desired aesthetic (matte,
satin, or glossy).
4.
Practice patience: Rushing the finishing process often leads to
poor results.
a.
Allow adequate drying time between coats, and
resist the urge to handle the piece too soon.
b.
Many finishes continue to cure and harden for days
or even weeks after they feel dry to the touch.
5.
Experiment and learn: Don’t be afraid to practice on scrap pieces.
a.
Experiment with different finishes and techniques
to understand how they work and what effects they produce.
b.
This hands-on experience is invaluable for
developing your skills and finding your preferred methods.
Whether you are a professional woodworker or a hobbyist,
understanding and mastering these techniques is essential for creating
high-quality wooden items that stand the test of time.